Wednesday 29 January 2014

Sprue Cutters Union #26: The Glue that Binds us Together.


Glue. That's what Jon wants us to talk about this week. Actual glue. Not metaphoric glue. We'll probably see a fair repeat of products from the group, I'm sure, but no doubt we'll each come away with a small eureka moment - a tiny 'aha! I could do this thing in a different way!' kind of realisation. Here we go, then:

Plastic Glue
I use any liquid poly cement I have lying around at the time. My Revell Contacta ran out, so I bought some of the Humbrol equivalent.


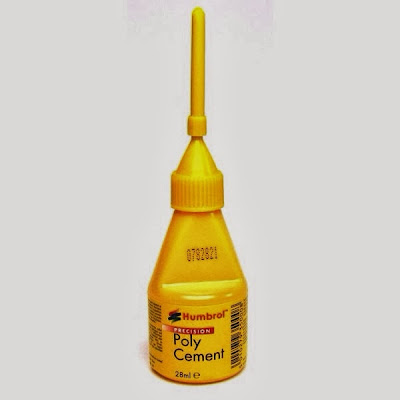
It does exactly the right job, although I keep the syringe clean by inserting a long sewing pin into it to prevent the poly cement from drying in the nozzle end.

Super Glue

My CA weapon of choice is Zap a Gap. It comes in thin, medium and thick, and I currently only have the green medium version - the others ran out or dried in the bottle. I used to keep them in the fridge for freshness, but my wife saw the end of that. Not cheap, so store carefully.


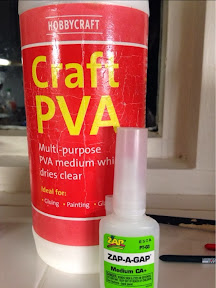
The reason it's sitting next to some PVA is a recent discovery - yes, I use school PVA, too, by the bucketload sometimes. It's a brilliantly versatile adhesive, and not limited to crepe butterflies on sugar paper backgrounds. If you mix a few drops of CA into PVA, the moisture in the PVA reacts with the CA giving a quick-hardening paste. The heat exchanged in this reaction helps set the PVA as well. It won't dry clear anymore, but you get a thick, solid thing to stick with. Work quickly, though...


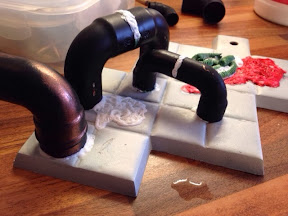
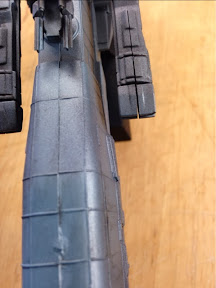
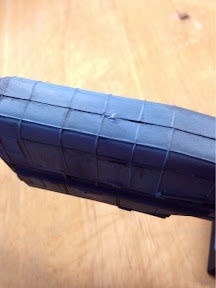
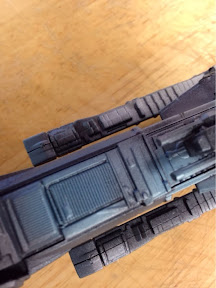
These copper pipe-ends are stuck with a belt-and-braces approach of green stuff putty and PVA/CA. You get a quick-set and a durable cure. You can also use a PVA/CA mix for special effects gore - I mixed a red paint into the PVA before adding the CA. The reaction, along with some wooden stick stirring, gives a nasty, porridge-like texture. Nice for splatter.

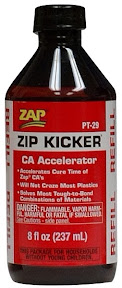
I also use zip-kicker to accelerate CA drying, but sometimes find it makes the glue brittle, and parts don't stay together for long. Sometimes a pinned part benefits from a small dot of green stuff for the long-cure, but sets quickly with an accelerated CA joint.


2-part Epoxies

Sometimes, you just have to wait for parts to dry and cure. Usually, big resin pieces don't play well with superglue, and they're not plastic, so what's the right glue for the job? Resin glue for resin pieces...

Milliput is a like an industrial green stuff. It's not glue, it's a putty, and could be used to sculpt stuff. It's also pretty decent at joining and filling, and sets rock hard.


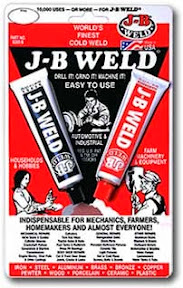
JB Weld is a similar beast to Milliput, but is thinner. It's used in automotive repairs, and is great for holding big resin chunks together.


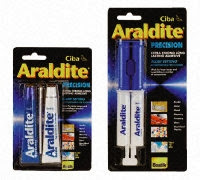
My dad always swore by Araldite when I was a kid. No reason not to follow his footsteps. It's great, but takes forever to cure. Make sure your parts are held together with elastic bands, clamps or clever jigs (don't trust that gravity won't screw it up for you). It's now available in a handy single-mixing syringe, so you don't have to measure and guess!


Last on my list is the magical Micro Kristal Klear from Microscale.


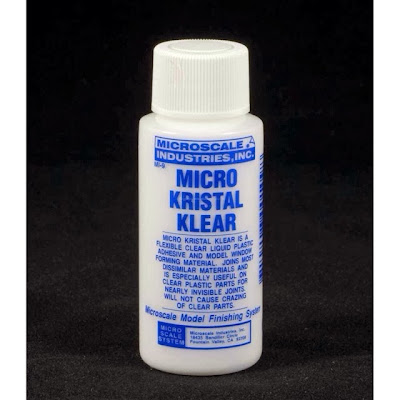
If you're fixing clear parts - canopies in particular, you don't want the plastic to fog up. CA and liquid poly are awful for this. Liquid poly melts the surfaces together, and CA reacts with the clear plastic, leaving a nasty opaque patina.

Micro Kristal Klear (there are other similar glues available, but this is the one I use) is formulated to stick without fogging. It works. Simple.

So there you have it - my sticky weapons of choice. Below are a few other Sprue Cutters' selections.

The Garage Gamer
Jeroen Vantroyen
Fill n Sand

Wednesday 22 January 2014

Sprue Cutters Union #25: Finding the time, making the time


How do you find the time to model?

Jon's posed us an deeper, more subtle question than it looks on the surface.

I remember a time when I'd push my homework to the edge of my desk, grab my granddad's tea-box/cigar box, and pull out my Humbrol enamels, a brush and whatever kit I was ruining (sorry, 'working on').

I remember another time when I'd just say 'I'm going to the garage to paint'

Then there was all that time my wife was pregnant, would watch endless '24hours in A&E' or would go to bed early, and I'd have simultaneous hobby time.

Of course that's all history. You don't stay a kid all your life (or do you?), and your wife only has a limited run of actually being pregnant. Even when she got pregnant again, we had the issue of baby #1 doing his thing all light long. Hobby bliss was not the same.

I found that taking over some space in the kitchen (not a popular move) meant I could glue a part, or paint a section while eating breakfast, and generally 'getting ready' for work.

I'm writing this on a bus to work. I usually drive, as my wife and I commute together, to the same office, but as she's part-time, and has the toddlers mid-week, I try and get some blogging done. If the bus wasn't so crowded, I'd bring the paint, too...

I've written recently about the pitfalls of forcing hobby time - before Christmas, I had planned a day in the office when work was non-existent, so I could paint. The results were less-than-favourable. The light was dull and a tad orange, and with the blue glare of the computer screen I couldn't get the colour balanced well. The air-con dried out the paint quickly, and my desk is too low. As I wrote, it's a good place for prepping and gluing, if not for painting.

I had a week off last week - unofficially rolled-over leave from last year, that would otherwise have been lost. So I just didn't go into work.

I had Monday and most of Friday to myself - no toddlers, no wife, no stepkids, and I made use if it by setting the airbrush up in the kitchen. I didn't get any gaming miniatures painted, but I did finish the USS Sulaco, and got most of the Alien3 xenomorph done. I'm about 2 hours away from finishing it.


I finished the Alien figure about 8-9 years ago, but had no ideas for the base. It sat in a box, waiting for inspiration. The inspiration's finally arrived, and now I can't even make the time to harness it!

It's at this point in a model's progression that you can't fake time. You can't just grab a brush or a file while you sip your coffee. You need to sit down, relaxed, and work. This is the part of modelling where you make or break the final article - "it'll do" or "Crystal Brush".

And, as it's not a commission piece, if I have to wait another six months before I spend my final two hours with the model, that's how it has to be.


See how other Sprue Cutters are finding time to put paint to plastic...


Fill n Sand

The Combat Workshop

And the hub where future links will be found...

Monday 20 January 2014

A Finished Project: Halcyon's 1/2400 USS Sulaco

I've been a fan of the Alien series of films since I was a teen. The Beatties chain of model shops used to stock the best array of model kits, from standard 1:72 Airfix planes to what I considered to be the most exciting kits - sci-fi tie ins. They had AMT Star Trek kits and the Halcyon Movie Classics range - these were catnip for me. I went in every Saturday just to look at them. I saved up and bought a Back to the Future DeLorean kit. I wanted the Alien kits, but they were expensive, and the vinyl Face Hugger and Chest Burster kits were ridiculously pricey (£90 in 1992/3 wasn't even Christmas-present territory)

The USS Sulaco was the Colonial Marines' ship in James Cameron's 1986 sequel, Aliens. It transported its crew to LV-426, to make contact with a blacked-out colony of terraformers. It was also seen in Alien3, as it drifted towards the Fiorina prison planet.

As I've mentioned recently, this model is one I picked up on eBay about 10 years ago to repair and paint. It wasn't boxed, and was missing the tiny Drop Ship, but it had the instructions and the original decal sheet. Should have been a breeze to fix.


It's a well-known kit for being poorly moulded. Pin holes and ill-fitting parts are just the beginning. I've seen modellers super-detail this kit with Plasticard panels and textures, to give a better sense of scale once they've force-fitted the edges. I've even read complaints that it's the wrong size; that it's too short for the usually included Drop Ship. Rivet-counters be damned, I thought - I'll finish this as if straight from the box.

However, it was poorly built, held together with the strongest glue, meaning I couldn't prize it apart without destroying it. I made a half-hearted attempt to clean up some of the sprue flash (see above pic for the extent of plastic faux-pas), but decided that a painting exercise would be the best use for it.

Out came the airbrush. Out came the decal toolbox. Out came the washes. Out came the satin varnish.


It's a definite 'Monet'. To be enjoyed from 'just enough' distance! Don't get too close!


You can see from the bottom photo, that the MicroSet and MicroSol worked a treat. The decal has no carrier film silvering, so I'm happy about that, at least.

More Alien-related work to come. Stay tuned!

Saturday 18 January 2014

Sprue Cutters Union #24 - Pet Peeves

My BlogPress app just crashed, and I'm rewriting this whole thing from scratch.

Bugbear number 1, then: technology...


For the first union post of 2014, Jon's asked us to air our feelings on what annoys us:

What do other modelers do that gets under your skin?

I'll go with 3 areas, in no particular order, and with lightness in mind - no offence intended...

1- Spelling/grammar

2- Swearing

3- Poor photography


They're all related, actually - I guess they'd fall under the bracket of professionalism. We're all enthusiastic about our hobby, and we like to share our projects with our peers.

I personally believe that if we put ourselves in any public spotlight, we should show ourselves in the best possible way we can. This means being a bit less lazy with checking grammar and spellings (non-native speakers are excused 😜), and absolutely not swearing online. We learned all of these things at school, no?

If we're producing awesome models (and we are), and sharing our work and advice with everyone, we should do it as if we were getting paid for it. I work for a print-and-online publication as my day job, and we all have to be super-detailed about our information quality control - even in my video department.

I'm clearly getting on a bit - I'm in my mid 30s, whining about people swearing in blogs and on Twitter - but I see it this way: my kids will eventually (hopefully) be following the hobby, and following the same people I do for inspiration. I don't want them thinking it's normal to flame people just because they disagree with them. I don't want them ranting about football managers to their peers.

Getting back on-topic, hobby-wise, the last thing I want to mention is poor photography. I'm sure I'm at fault with this, too, from time to time, but I don't think it's in our best interests to take bad snaps of our finished models! WIPs are okay, but once the process of gluing and painting is over, taking a phone pic in the dark doesn't showcase the time and effort we've spent.

Lighting, composition and focus; a clean background, and colours that are accurate to the model. If I'm trawling Twitter, and I see a 'finished' model sat on a cutting mat, with paint pots behind it, I feel a little disappointed. I want to see the detail. I want to be inspired by the model. I don't want to think "meh".

Here's a pic of my latest finished model. It's a 'meh' iPad snap that perfectly demonstrates my occasional disappointment...


See some other grumps' points of view here:

Eternal Wargamer

Plastic scale models created by Jeroen Vantroyen


Friday 17 January 2014

Some thoughts on past purchases

About 10 years ago, I spent some time buying up models on eBay - Deloreans, Batmobiles and Alien-related plastic, resin and vinyl. There were some kits that were in mint condition; some kits that had been started, but not progressed very far, and some kits that just needed stripping back, starting again and rescuing.

Suffice it to say, I quickly got bored of the rescue kits. I had plans, yes, but lacked the motivation to get them underway. There's a Powerloader kit from Halcyon with a Ripley figure - the kit needs wiring up for lights, and the head of the figure needs resculpting to look like a human female, let alone like Sigourney Weaver. I started the sculpt, and gave up within a day (not really a sculpter). I've since passed it on to a colleague, who apparently has done a good looking job on it, but I haven't seen it yet. And then the whole thing needs painting and battle-damaging. Maybe once day I'll tackle it.

Then there's this curio: The Halcyon kit of the Sulaco. In the film, the Sulaco flew the crew to orbit the infested planet, and then made it to the third film with a different paint job.


I bought the kit fully assembled - it was a beginners' attempt, unfortunately - the pieces weren't aligned well, and the sprue joints hadn't been cleaned off and sanded flush. The kit was in bare plastic, and the mini dropship model was missing, too.
Still, I bought it - about a fiver, I seem to remember, with the plan that I'd clean it up and paint it.
Nearly ten years later, and it's still in the garage.

Point? Life's too short. Either fix it or bin it. It's not worth anything otherwise.

So I started to fix it. Except that I couldn't remedy certain mistakes - the glue was too hard, the plastic too flimsy. And then I just wanted to paint it. So I did.


The airbrushing took about an hour and a half in total (after priming). If I had this kit from fresh, it would be a quick 2-day build 'n' paint. The mould lines would come away before any glue was uncorked, and the typical 90s asymmetry of warped injection-moulded plastic would be rectified with hot water and rubber bands. Simples.

The only reason I bought this model was because the mint kits are hen's-teeth rare. For now, though, I've enjoyed a decent paint-up practice for the next big thing. Decals today, and then seal it.

Maybe I'll think twice about buying kits to rescue in the future - for spares, yes. To restore? Hmmm.

Wednesday 8 January 2014

Duplicating parts - pros and pitfalls

Repopping.
Recasting.

I apologise for swearing so harshly. These are, by far, the worst words in the hobby.

eBay is awash with kits from the Far East pretending to be cheap, legit, versions of expensive, rare originals. The copyright thieves get away with a fair amount, too, as many kits are long out of production, so there are no legal teams to chase claims in court.

You won't find much in the way of GW pirating on eBay, but AEF Design, Geometric and Halcyon get a lot of repops, and some fancy short-run garage resin kits suffer from 'rereleases' in white vinyl or cheap, soft-edged resin. You can usually tell the originals from the fakes, and it's up to us to not support that industry.

I have some of these kits - granted, they're from before I knew enough about the issue, and I'll only use them for technique practice. I'll never sell them on - not in kit form or even fully finished.

That said, making copies of components can be useful for repairing kits, and depending on the complexity of the original you can achieve a good end result in a number of ways.

1. Silicone RTV rubber moulds - complex, 3D shapes
2. Press moulding - simple one-sided imprints

I'll go into detail another time about making rubber moulds. It's almost a black art to get right (much like mixing resin).

Here's a video I've created that quickly runs through the process of press moulding using a brilliant reusable substance called Instant Mold. I originally saw this on CMON, but you can get it, or variants of it, in many places online.


Here are some things to consider when making moulds of any sort.

1. Is this a copy of an existing component?
2. Is this component out of production?
3. Will I be selling this component as a standalone part or in a finished piece?

In all of the above, you'd be breaking a law somewhere. Ethical grey areas exist, especially when OOP kits and parts are involved, but the bottom line is: Copying something that someone else designed treads on that designer's toes in a heavy legal way.

In a lot of cases, you won't have any issues, but you are opening yourself up to problems.

In the case of my above video, I've copied a portion of a straw. I haven't checked whether the design is in the public domain or not, but I'm not making a copy of a straw to be used as a straw. It's for a texture that has no similar use to the original design requirement. I'm not a lawyer, but that's my understanding of the law. I've seen design-based lawsuits fail because 'look and feel' was for a different market, and consumer confusion wouldn't exist.

On the other hand, I once intended on producing a diorama based on a scene from Aliens. AEF Designs made some great 1:35 scale figures and eggs which matched the scale of Halcyon's APC vehicle. AEF Designs stopped producing these in favour of armour upgrade parts for more commercial subjects, but they still own the copyright for the Aliens figures - maybe not the licence to distribute, but certainly the rights to the sculpts.

Getting hold of these kits is expensive, but that doesn't mean I'd have the right to duplicate the eggs just to populate a diorama. The more eggs I'd need, the pricier the scene would become to produce, so a rethink was required.

Have loads of fun duplicating stuff for projects, but ask the right questions first. Also, be prepared to not like the answers you get through your research. It might not seem fair that it's illegal to dupe OOP parts, but then I'm not 6ft tall, and I can't fly, and that's not fair either.