Actual paid commissions are few and far between - my hat's off to anyone who makes a living doing commission work - but recently an opportunity arose that mixed three of my ideals: to build and paint a sci-fi monster - for a complete stranger - and get paid for doing it!
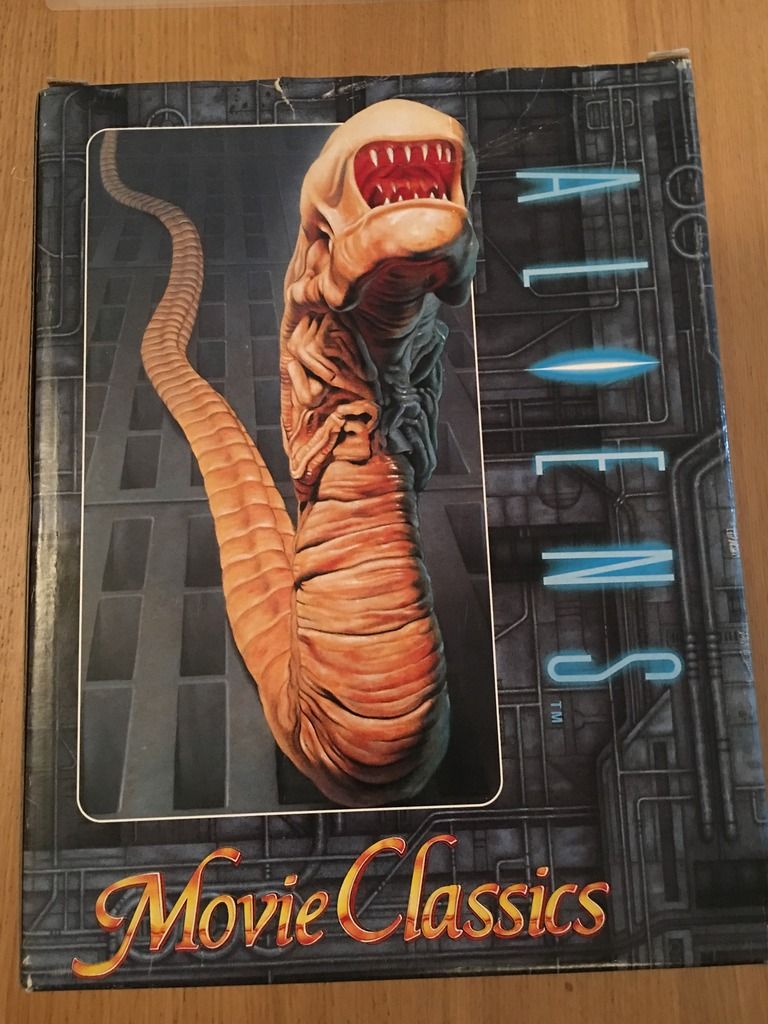
The model in question was the 1:1 Halcyon Movie Classics Aliens Chestburster from the very early 90s. As with many of that Aliens range, the kit is PVC - or just 'vinyl'. It's a great medium, and I've covered it before - even on YouTube - but it is fraught with pitfalls. If it's not prepped well, it's completely unforgiving.

Choosing the wrong primer, for instance, will stop subsequent layers of paint drying and curing properly, leaving you with a tacky finish (even if you varnish it).
But let's start earlier than that. The kit needs washing and scrubbing to remove mould release agents and whatever else has grown on it. Handling should be kept to a minimum.
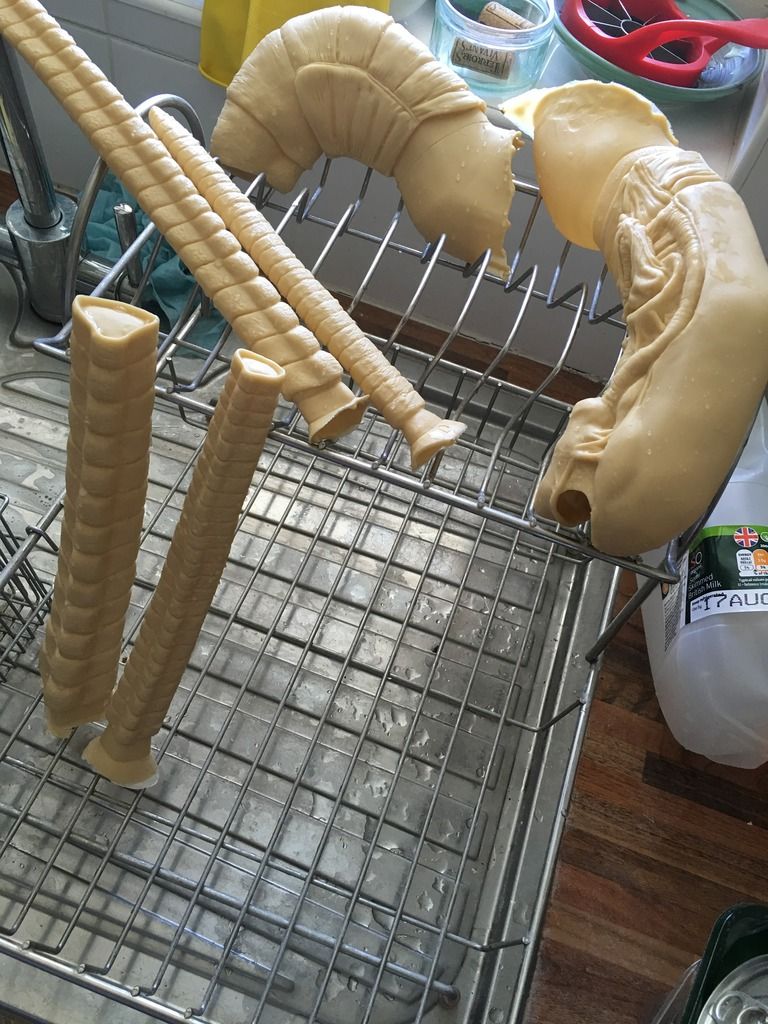
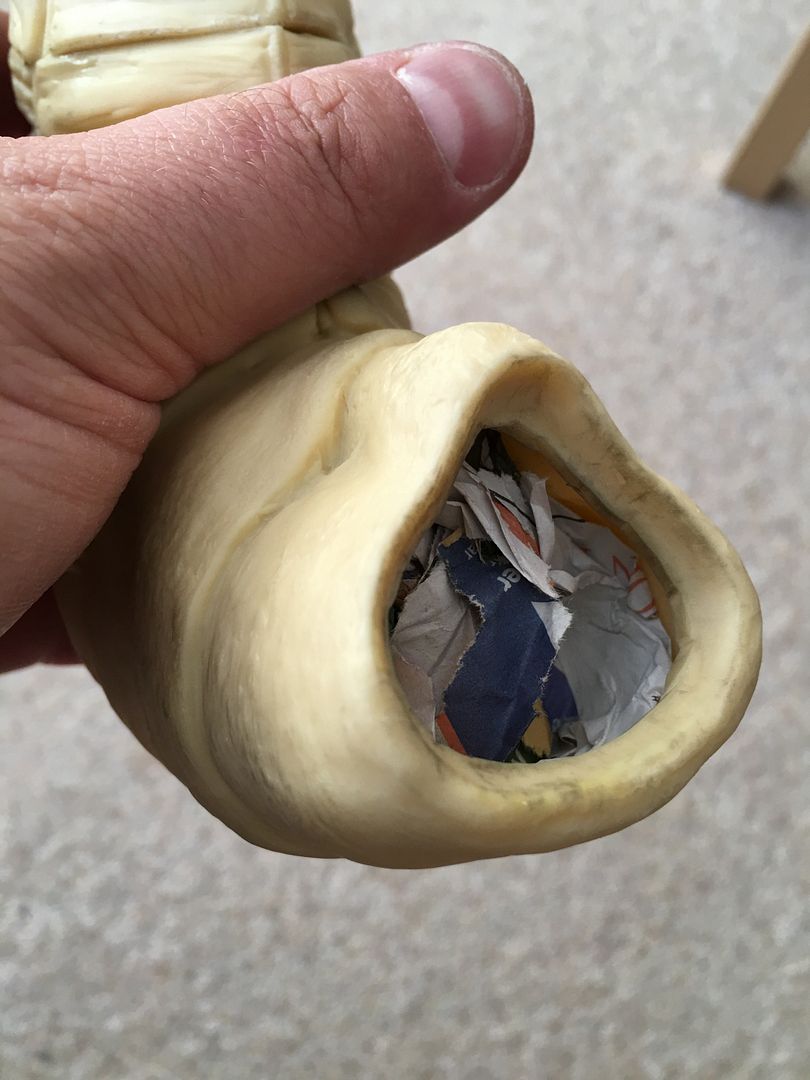
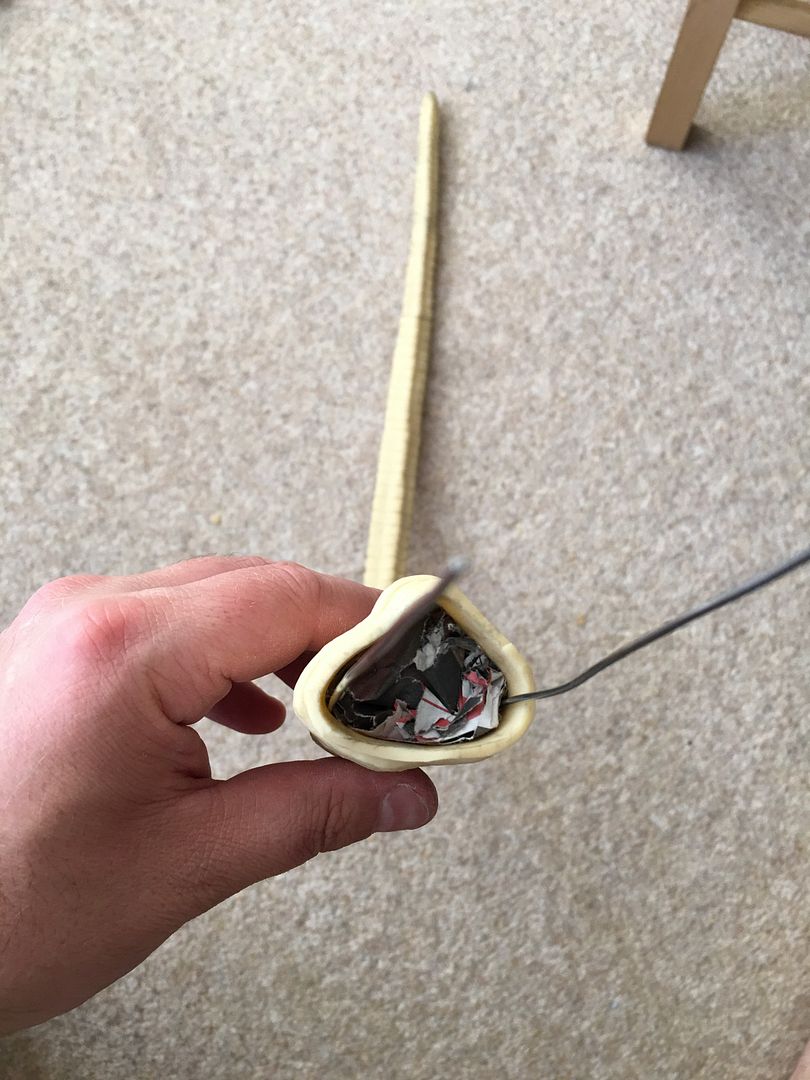
Heating and cutting the excess material is easy. This kit is quite soft, and only needs softening under the hot tap to trim away the flash and pour hole spludges. Stuffing it full of scrunched up newspaper is a good way to stop it sagging when it gets warm in the central heating, but the paper won't provide ballast weight. You'll eventually need something heavier.
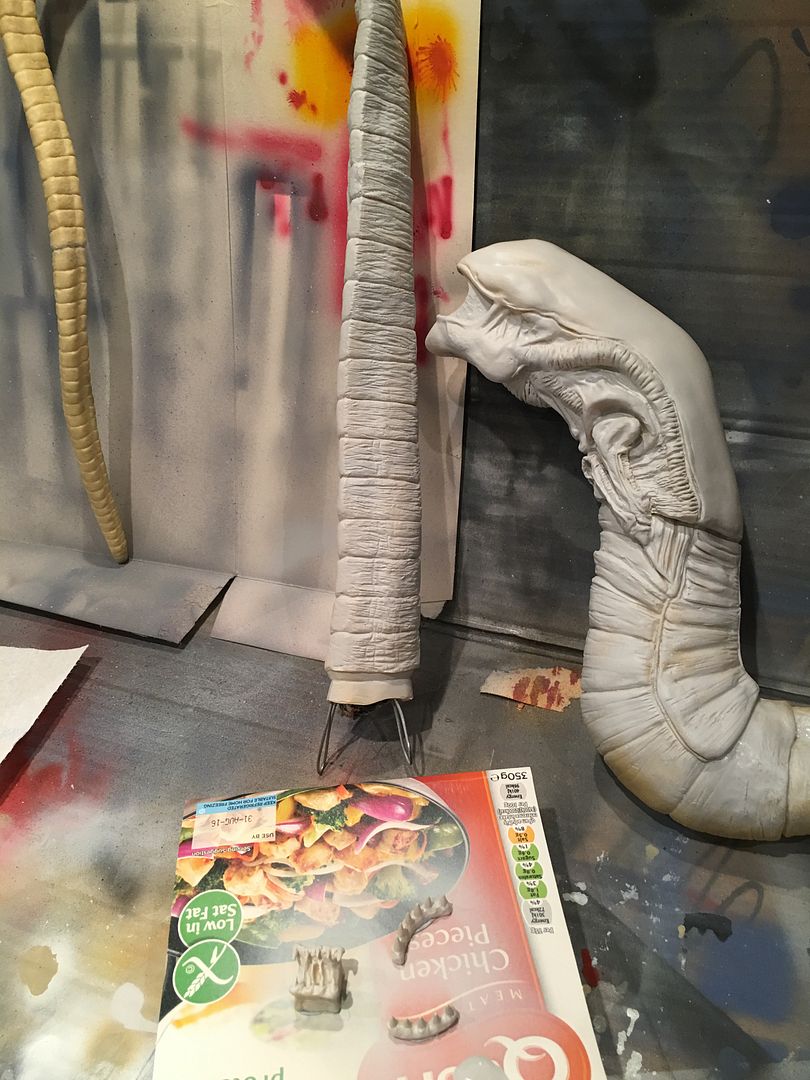
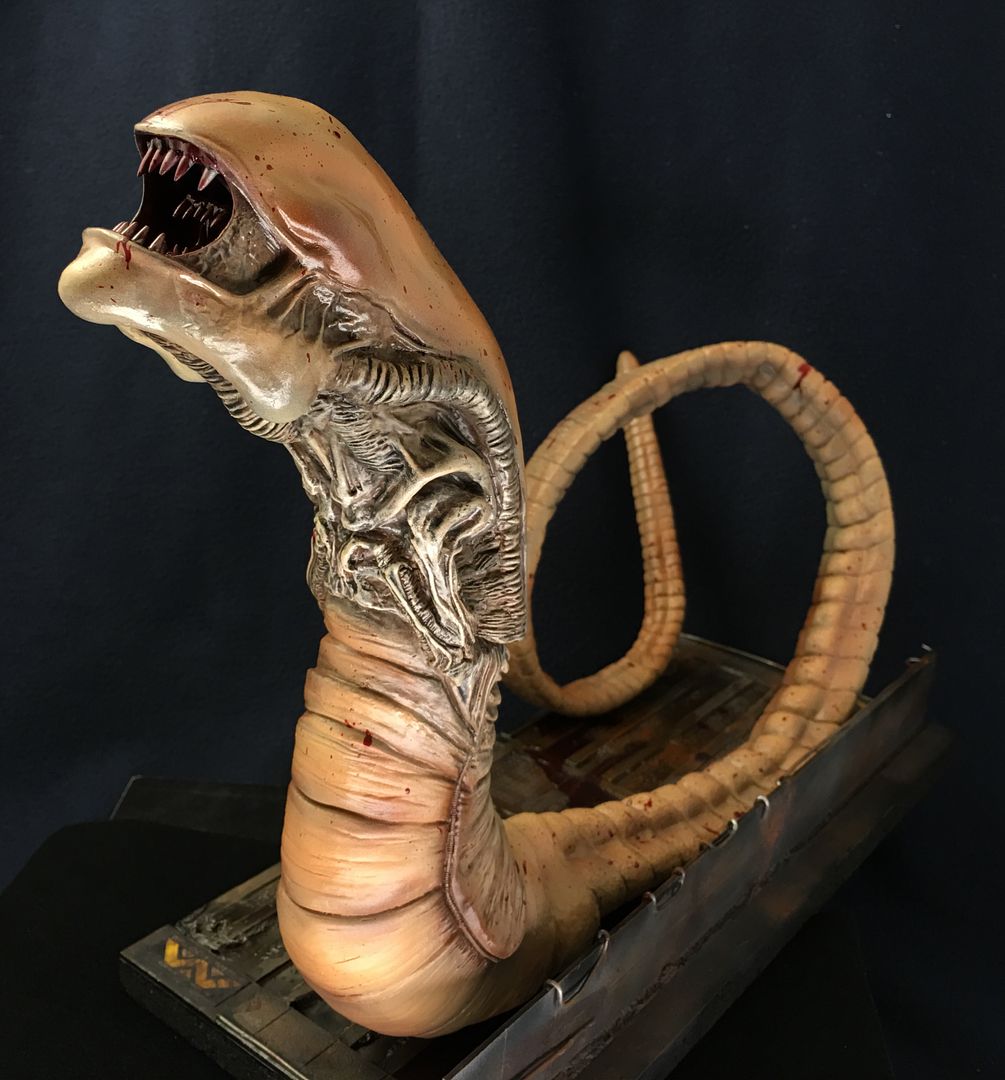
The Chestburster is also about 3 feet long, and has a tail that is a recast from the earlier Halcyon Movie Classics Alien Facehugger kit. Not a complaint - they are related, after all!
Without reinforcement, though, this tail is a nightmare to shape. If you're building your burster with a completely straight tail, it'll be fine without rebar inside, but won't it look dull? I prefer to have a model on display that looks like it's mid-action. I want this little beast to look like it's on its way somewhere to feed and grow, so I need wires. Thick wires.
These wires strengthen the shape, and act as an armature for the tail. I can warm up the vinyl, shape the piece, cool it, and it'll definitely stay in place if the wires are fitted. Vinyl has amazing plastic memory. Even after you reprogramme it to a new form, it could still revert to the original position if it warms up under the heat of the sun coming in through a window.
Finding a practical and dynamic shape for the tail proved to be a lot of trial and error. I always planned for the model to stand on its own, without the need for external support. However, the tail had other ideas. It would not act as a counterbalance to the body. Even with the wire and paper, the tail wouldn't keep certain shapes, and was not solid enough to support the weight of the top-heavy body section.
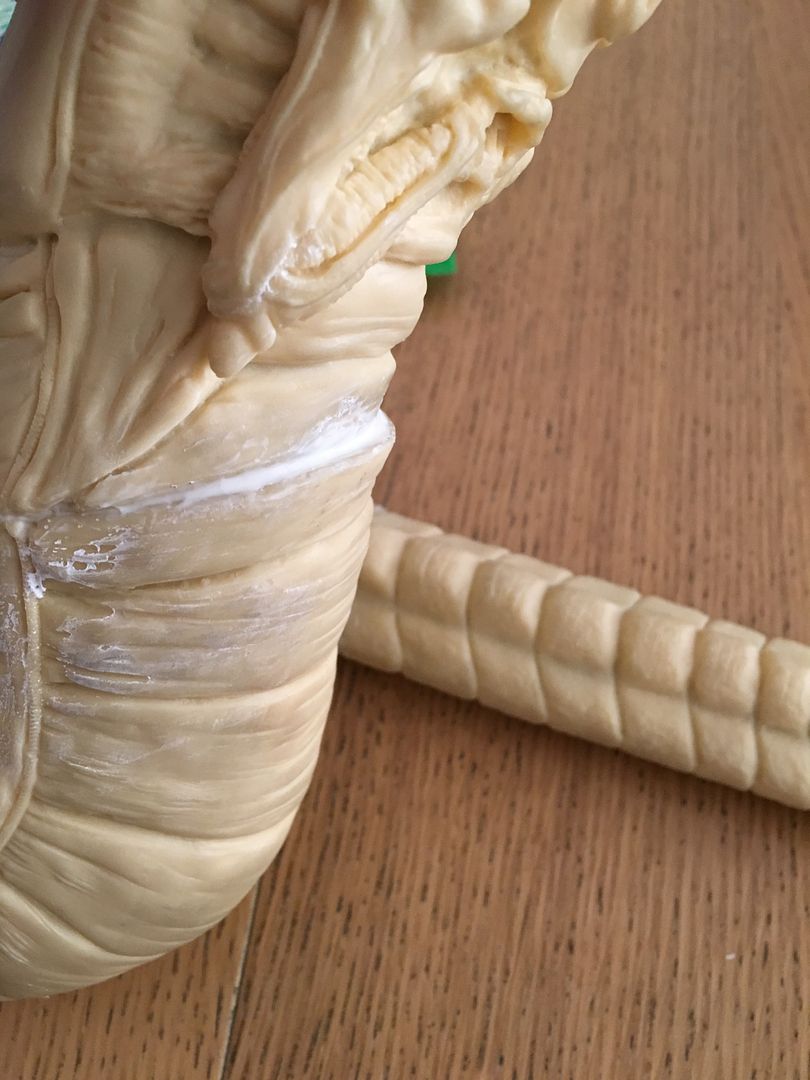
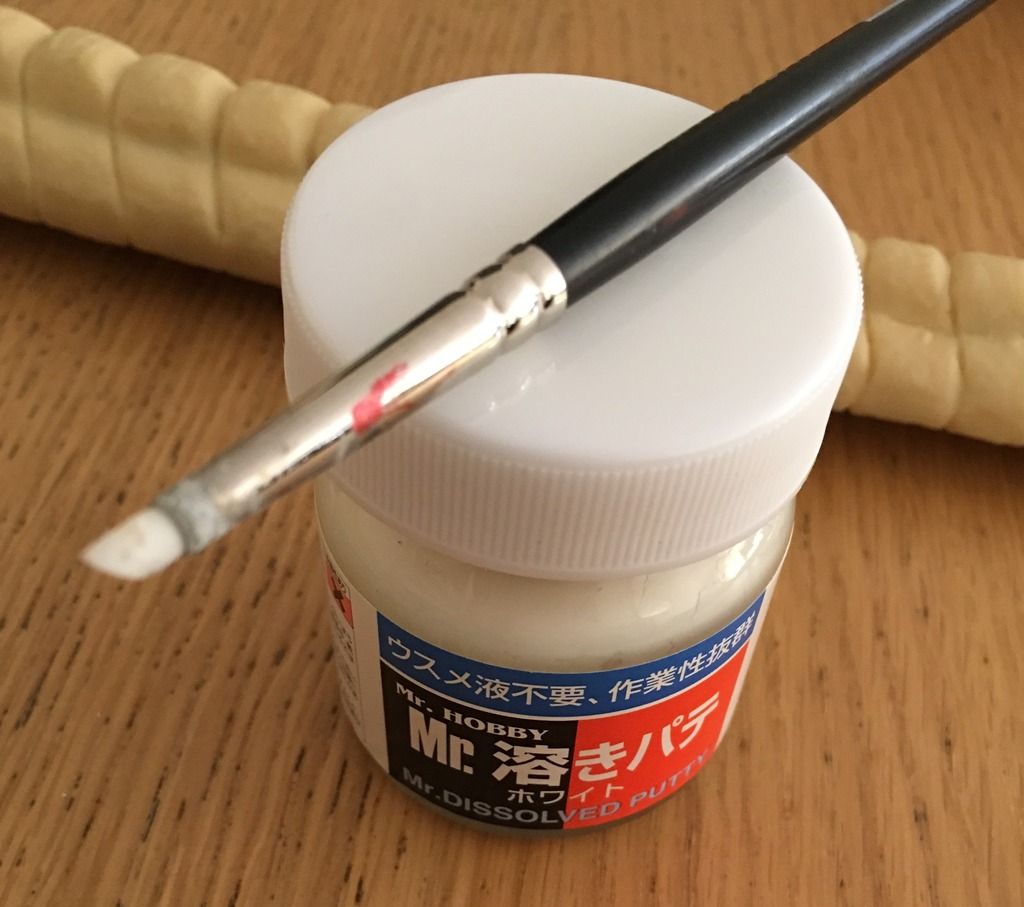
I kept the body and the tail separate for a while, until I had a firmer plan in place for pose and ballast. It still needed painting, so I decided to crack on and sort out the technical problems later. Some seam filling and it was ready for priming.
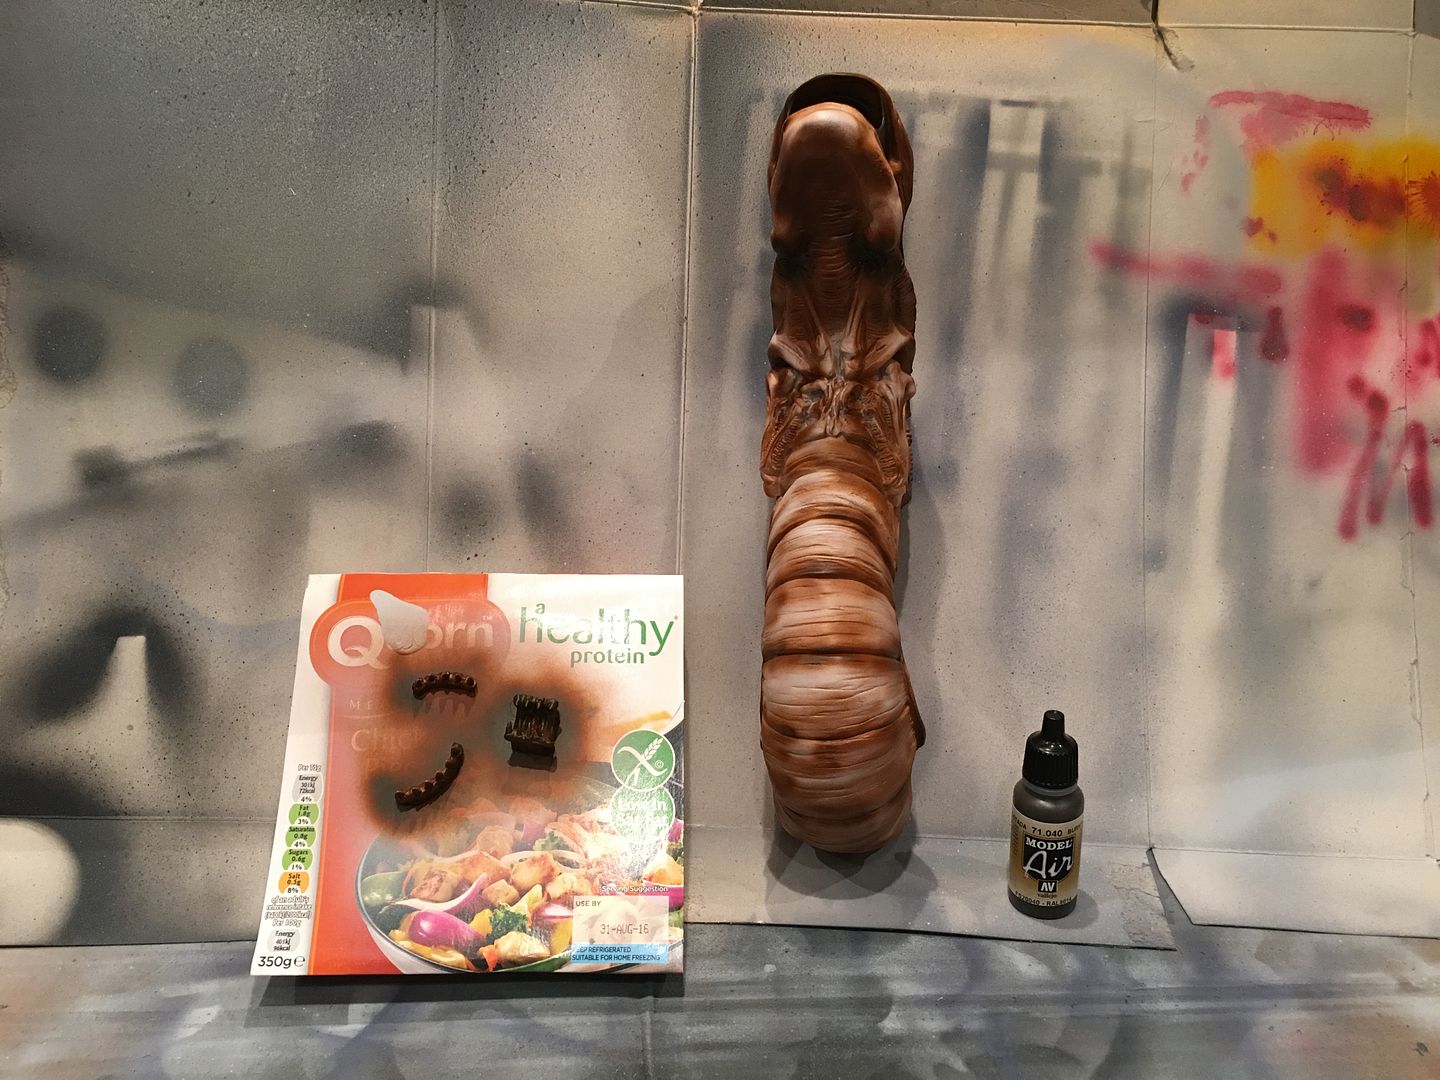
From here, it was a case of many layers and tones of preshade (greys and burnt umber, mostly), and intermediate layers of VGA Elf Skintone. Shade again, main coat again. I found this to give a rich depth of colour, which is needed for an organic figure like this.
Finding a practical and dynamic shape for the tail proved to be a lot of trial and error. I always planned for the model to stand on its own, without the need for external support. However, the tail had other ideas. It would not act as a counterbalance to the body. Even with the wire and paper, the tail wouldn't keep certain shapes, and was not solid enough to support the weight of the top-heavy body section.
I kept the body and the tail separate for a while, until I had a firmer plan in place for pose and ballast. It still needed painting, so I decided to crack on and sort out the technical problems later. Some seam filling and it was ready for priming.
From here, it was a case of many layers and tones of preshade (greys and burnt umber, mostly), and intermediate layers of VGA Elf Skintone. Shade again, main coat again. I found this to give a rich depth of colour, which is needed for an organic figure like this.
This summer has been unseasonably warm for the UK, so I had a few airbrush issues - paint drying on the needle too quickly (even with flow improver), and I suffered a few spits from time to time. Easily fixed, if a bit time consuming (soak and scrub the airbrush clean after every couple of coats)
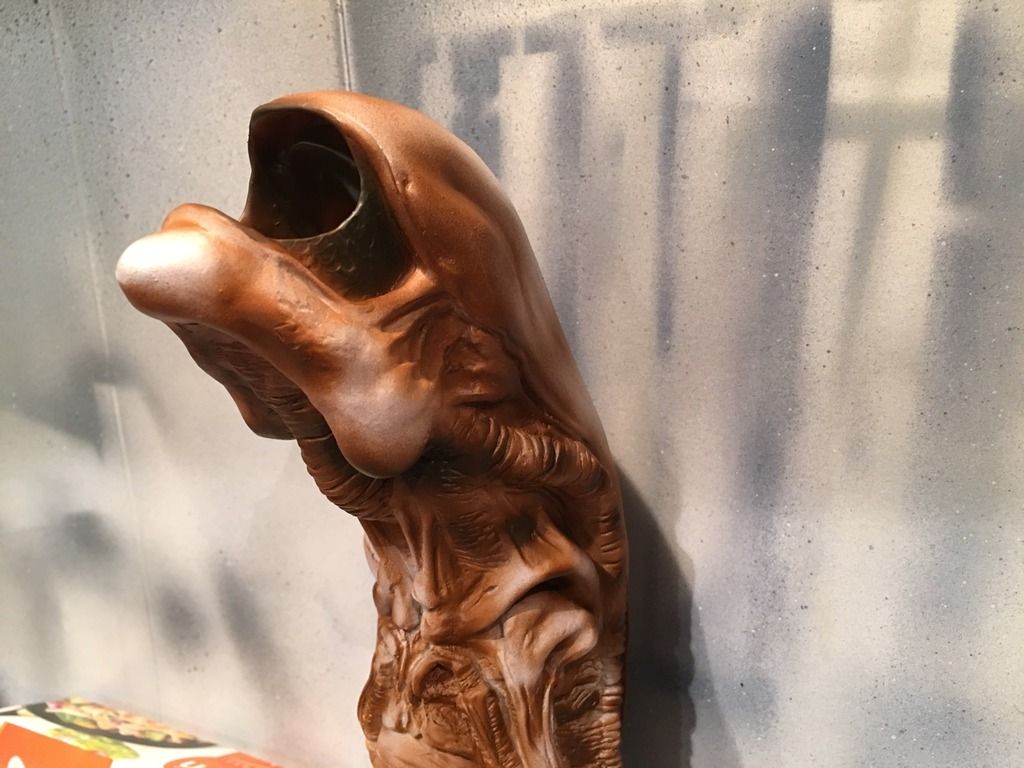
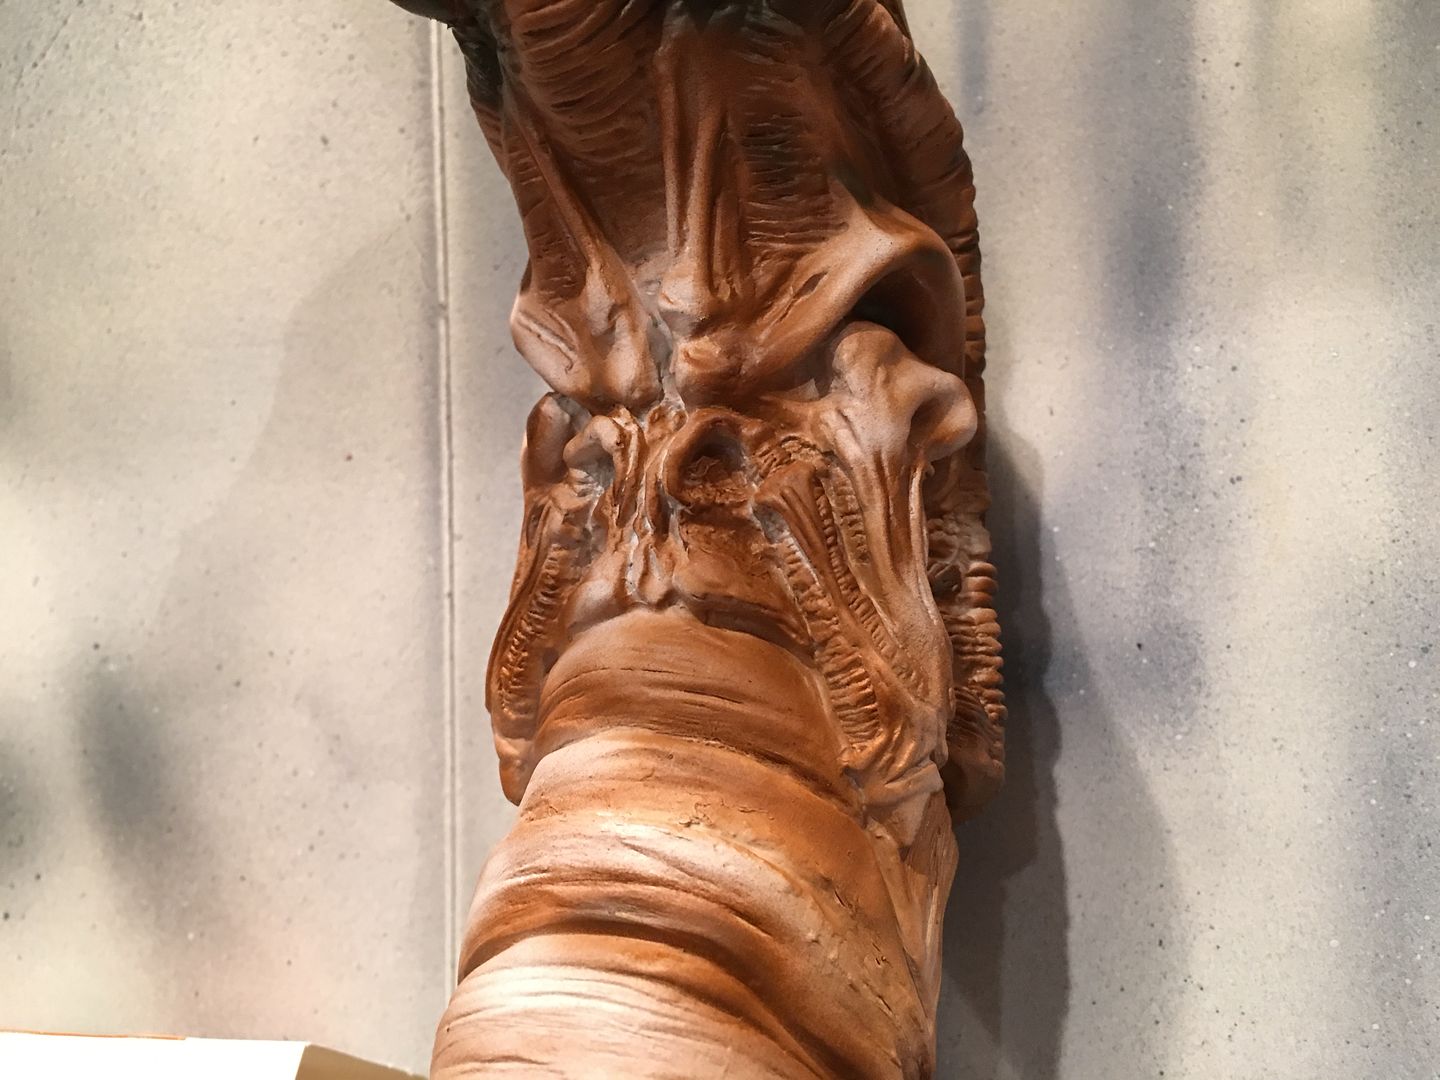
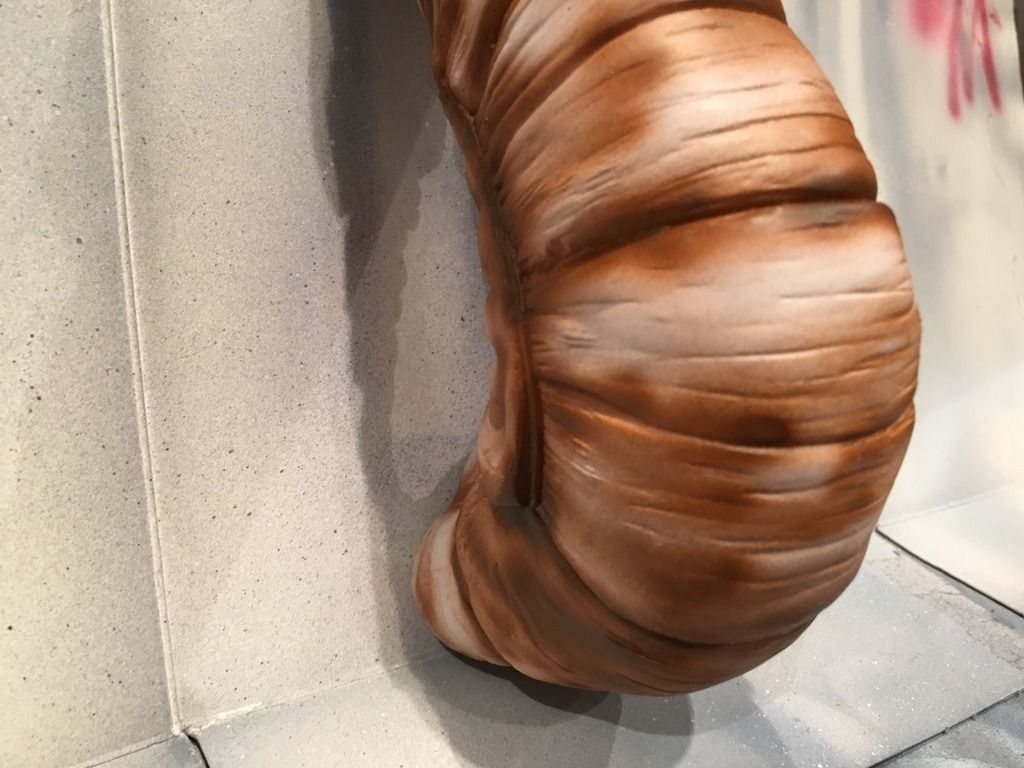
I love a good preshade. You can go absolutely nuts with related tones and you'll get a really natural feeling result on the top coat.
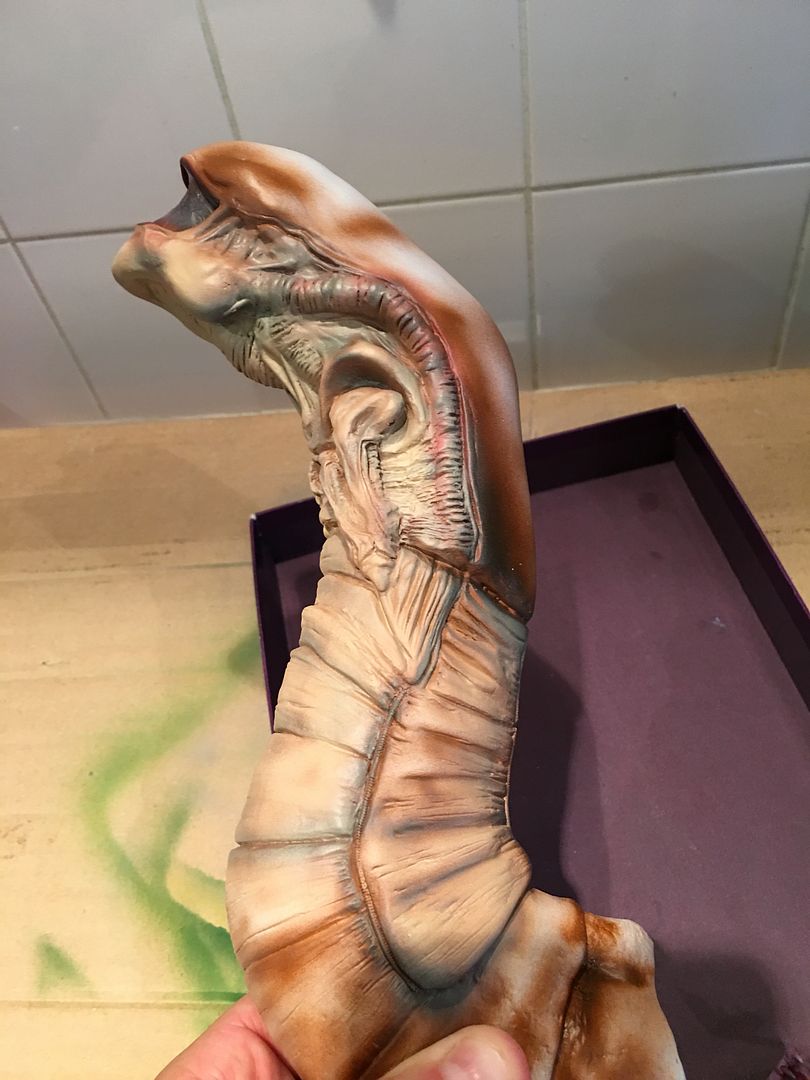
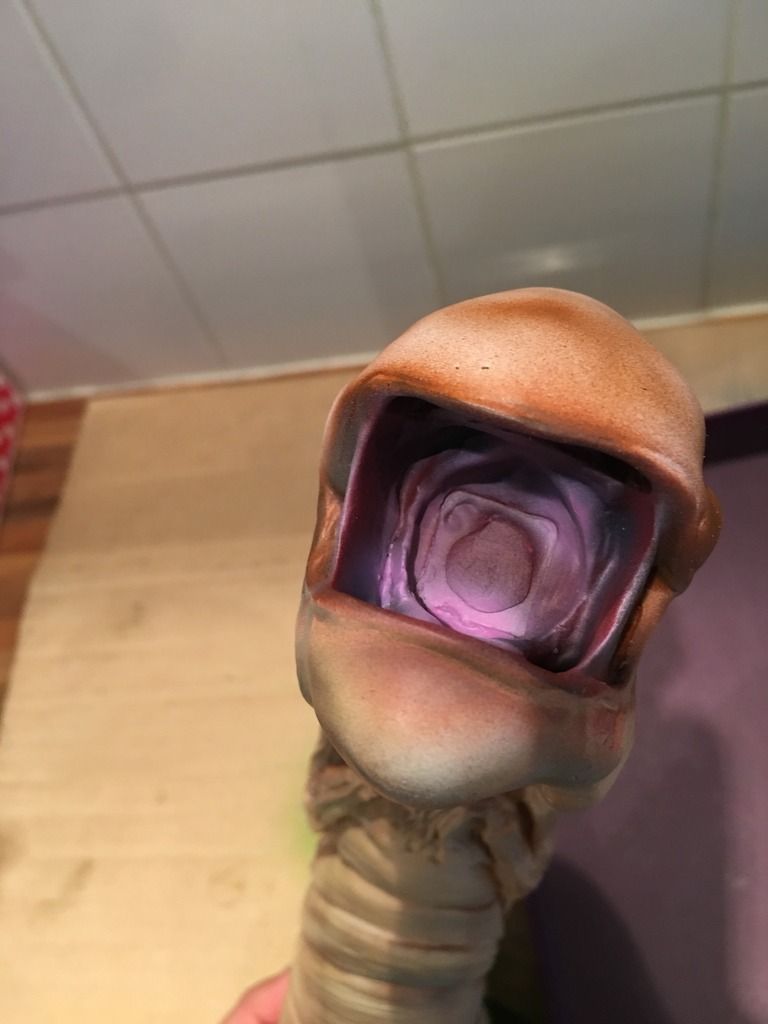
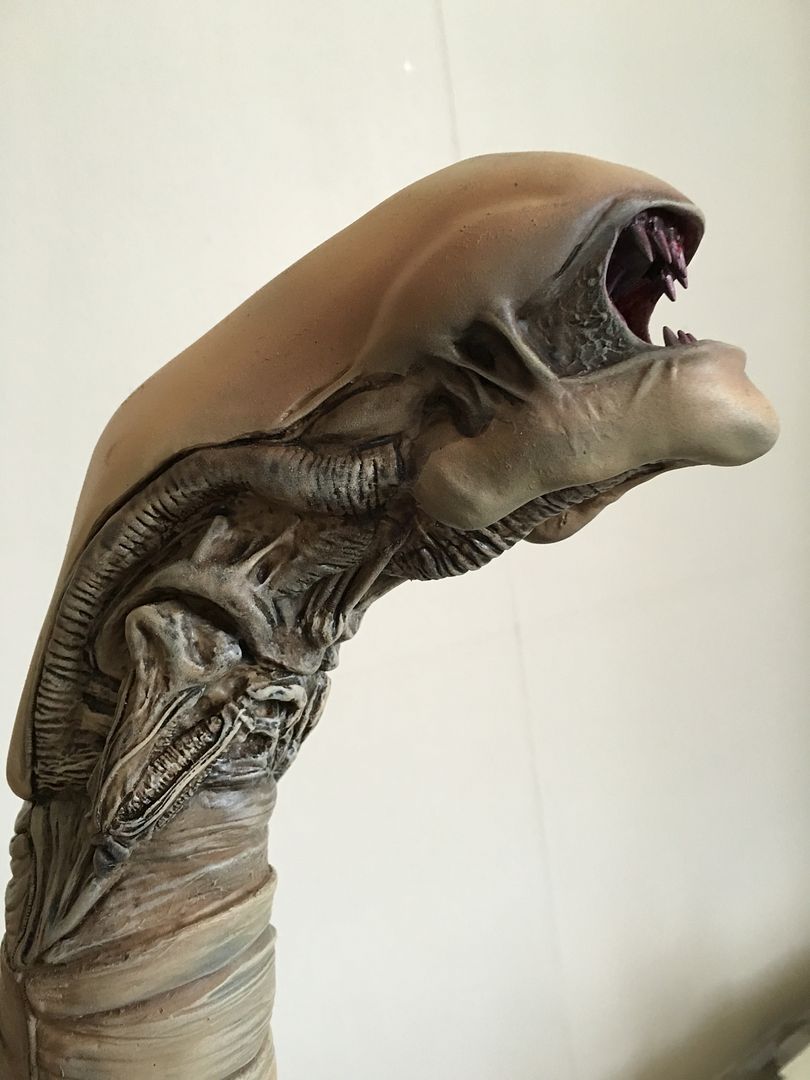
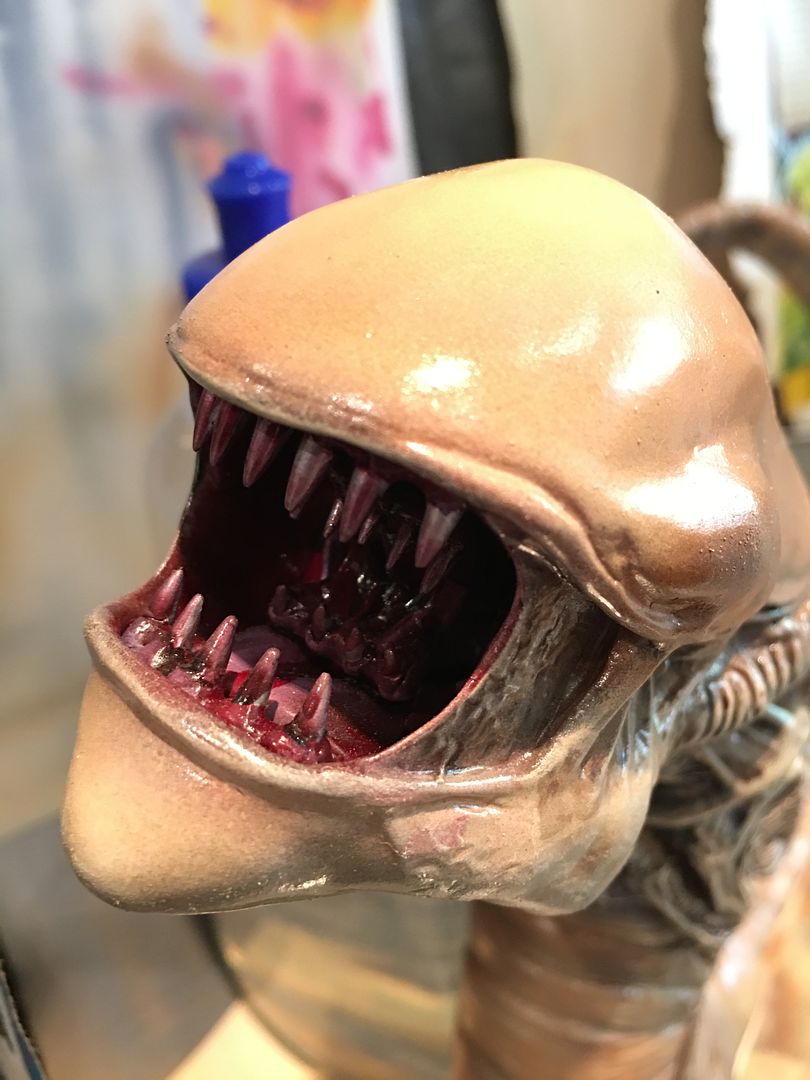
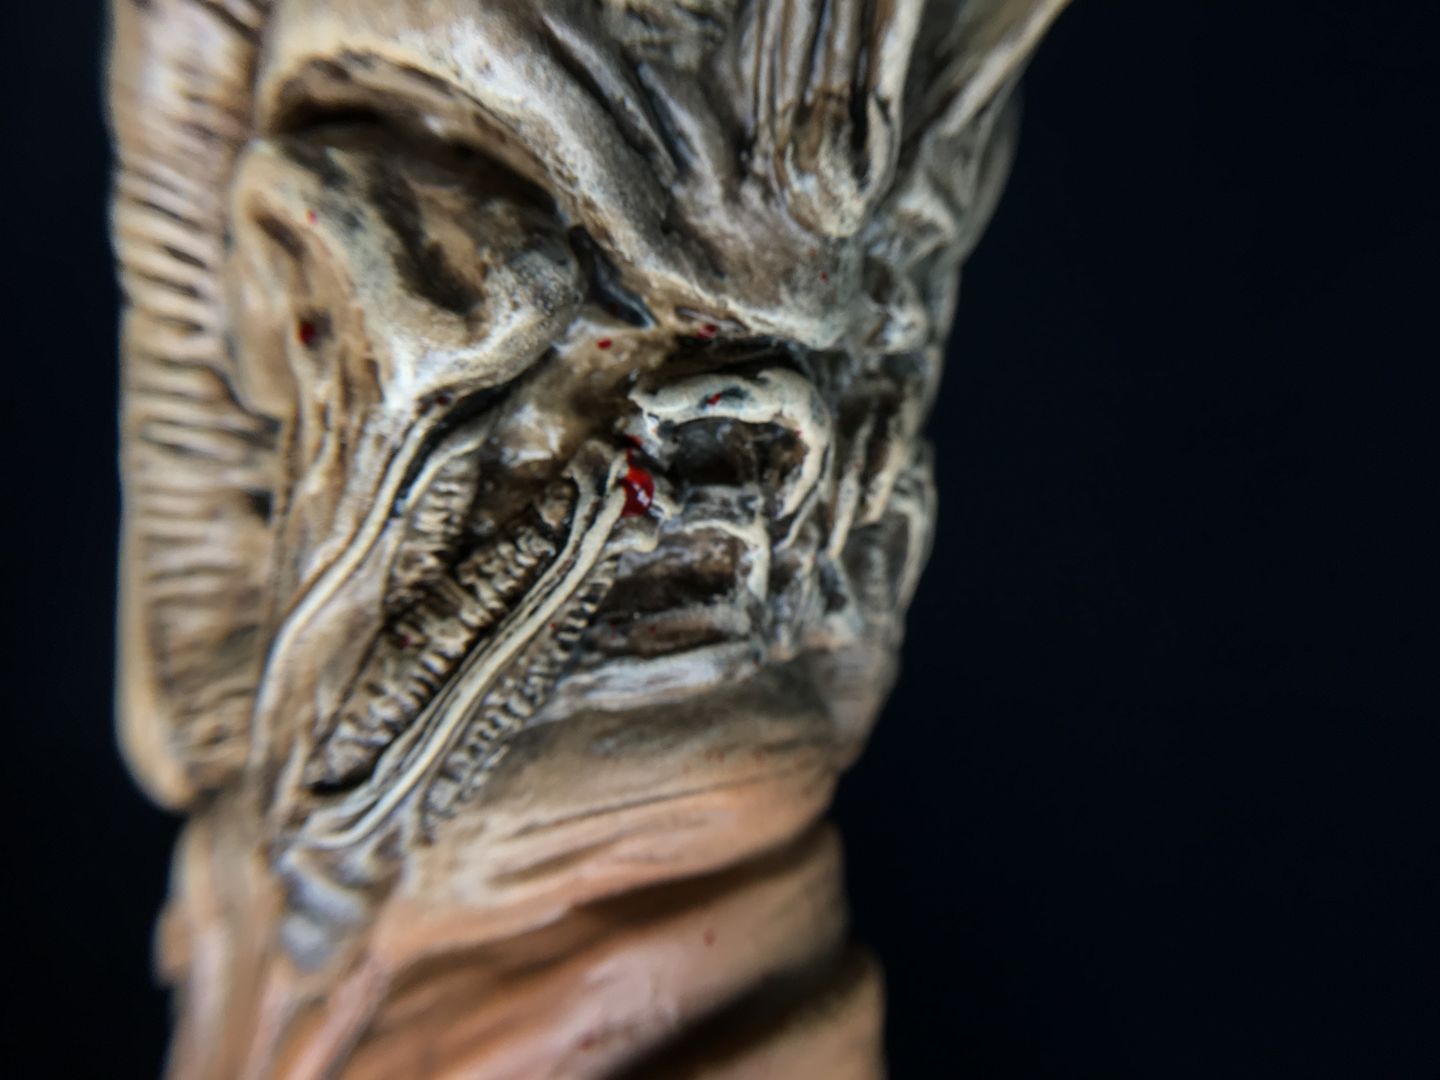
Of course, before the teeth went in, I painted the inside of the mouth. It looks waaay too OSL-y here, but there's a reason for it.
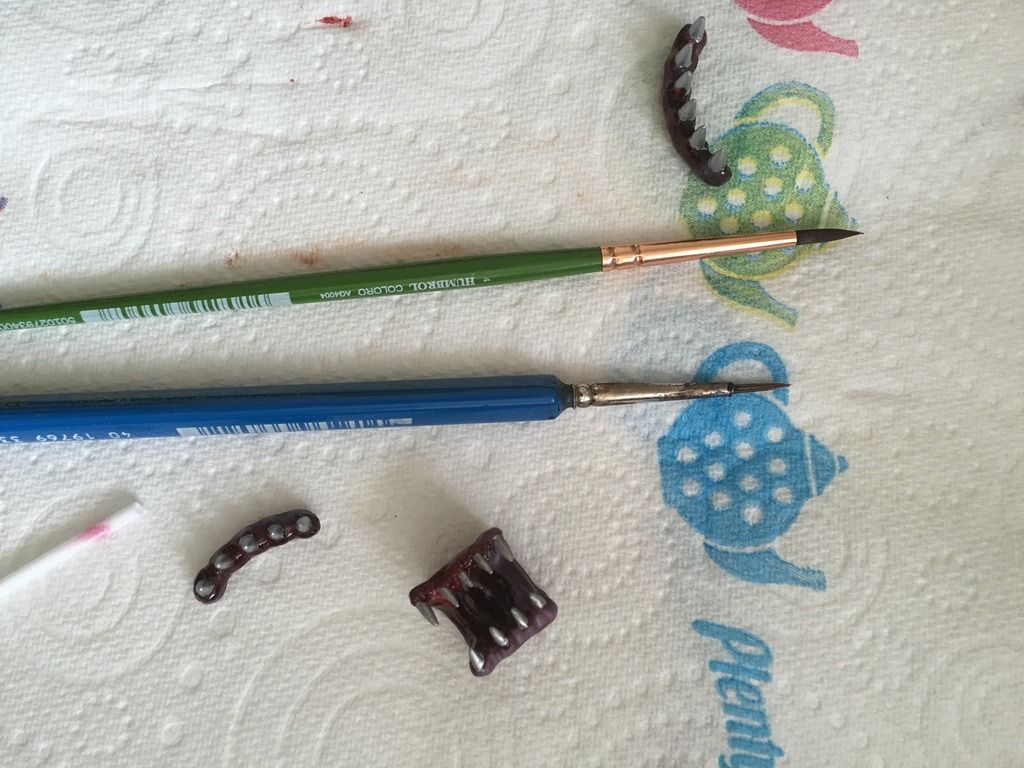
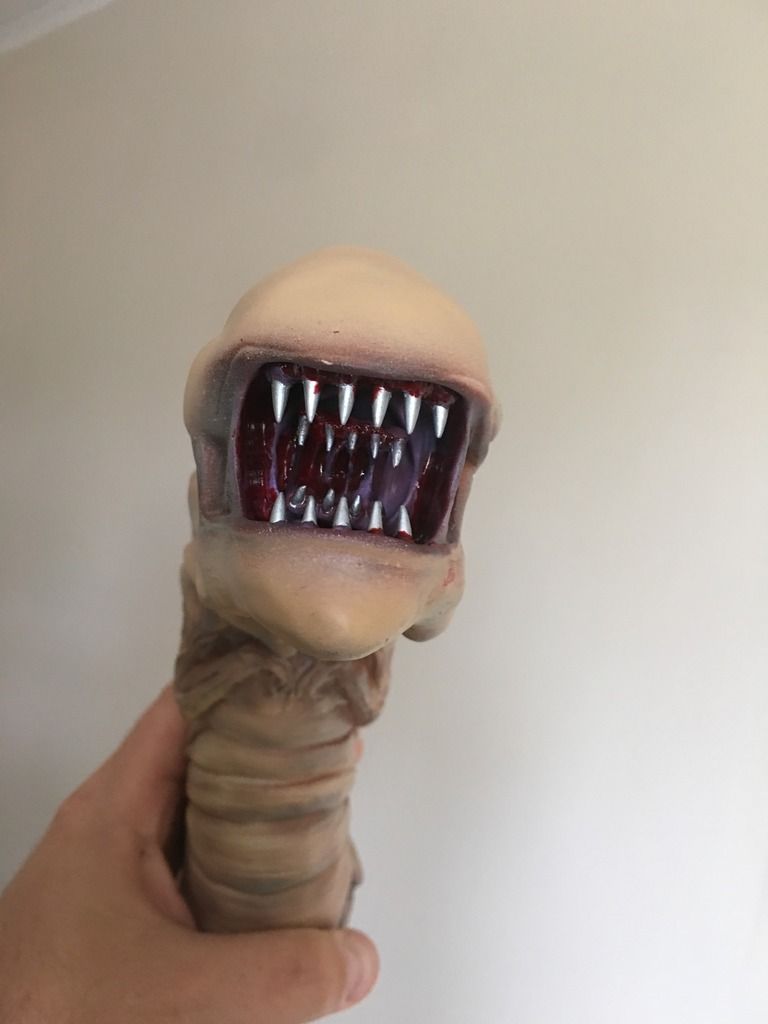
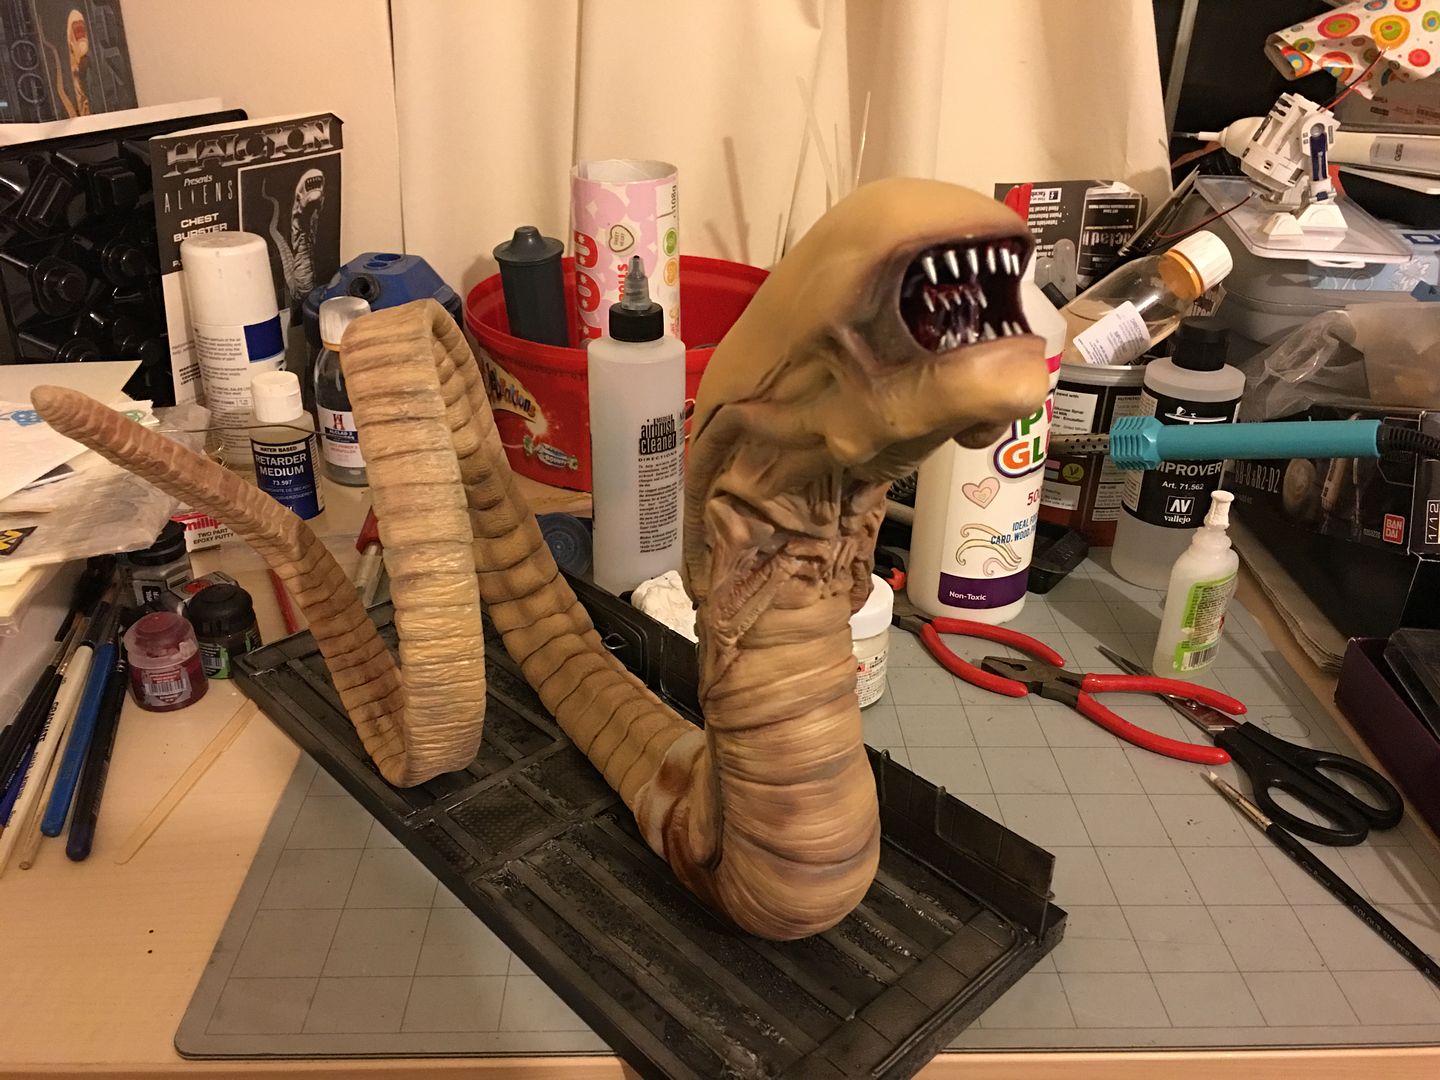
And while everything on the body is drying, it's time to sort out the teeth. Primed in grey, sprayed in VGA purples, and finished (teeth only) with Citadel Mithril Silver. They'll have more done once they're in place, but there's no point trying to get silver around the back of spiky things once they're glued in.
A test fit, just to be sure.
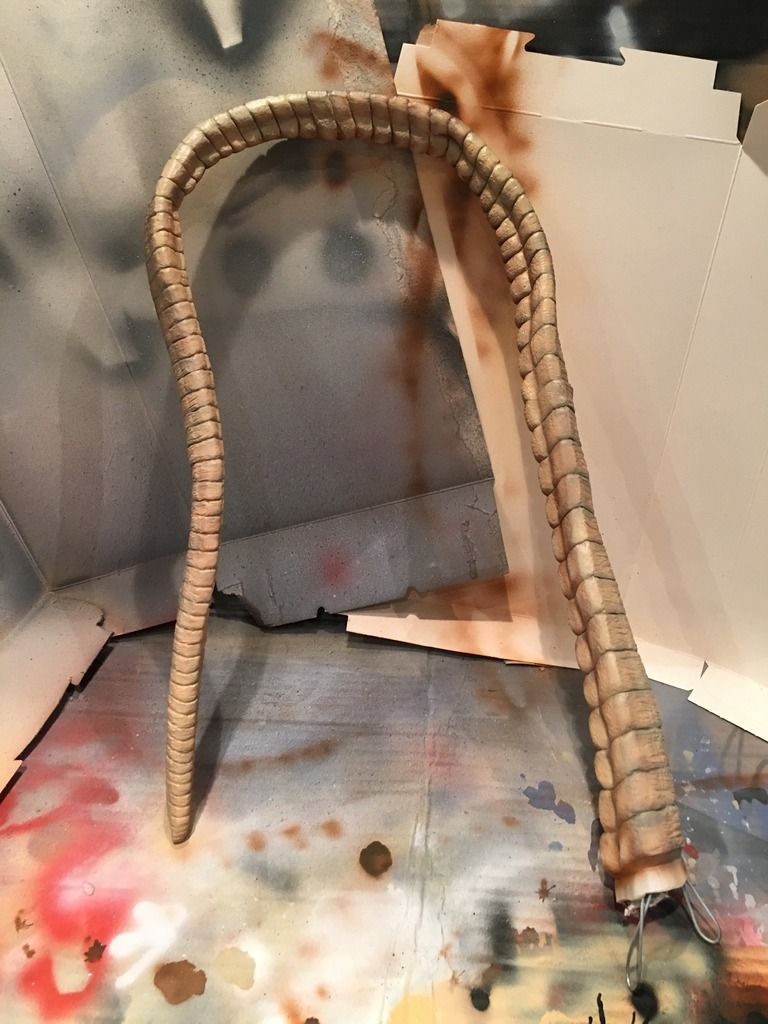
But how do we solve the problem of ballast, without filling the whole tail with plaster or resin. There's no one 'right' way (loads of wrong ways, though), and what I ended up doing was using the spindle from a roll of Mod-Rock, and wrapping it in paper and Mod-Rock. This fitted across the joint from the body and the tail.
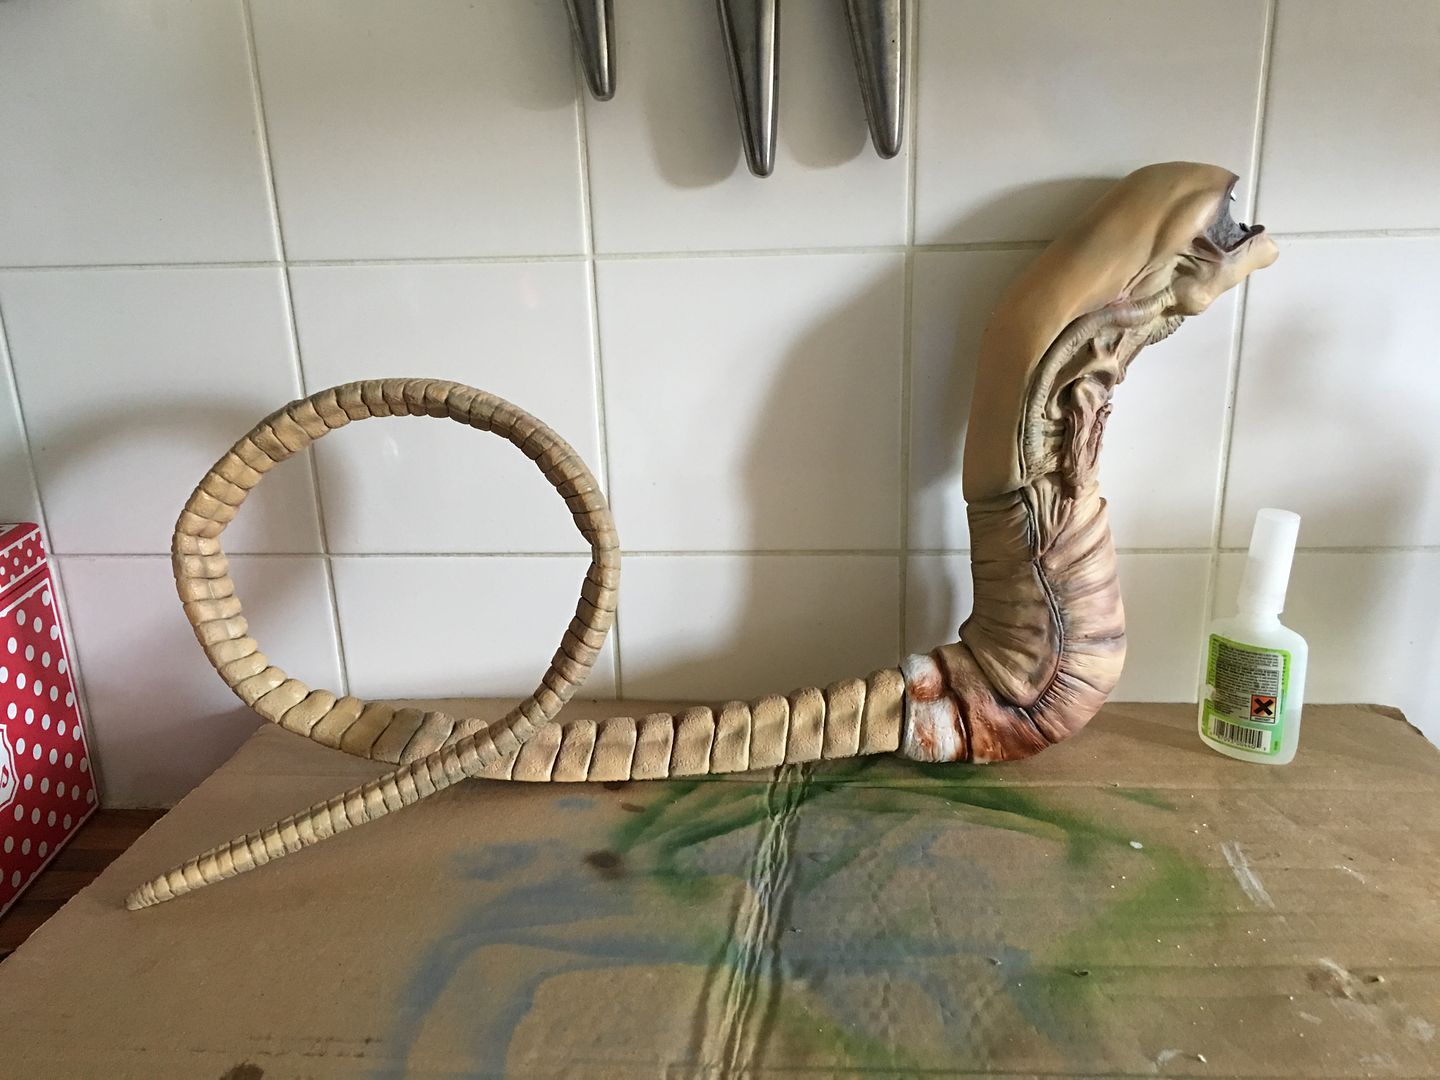
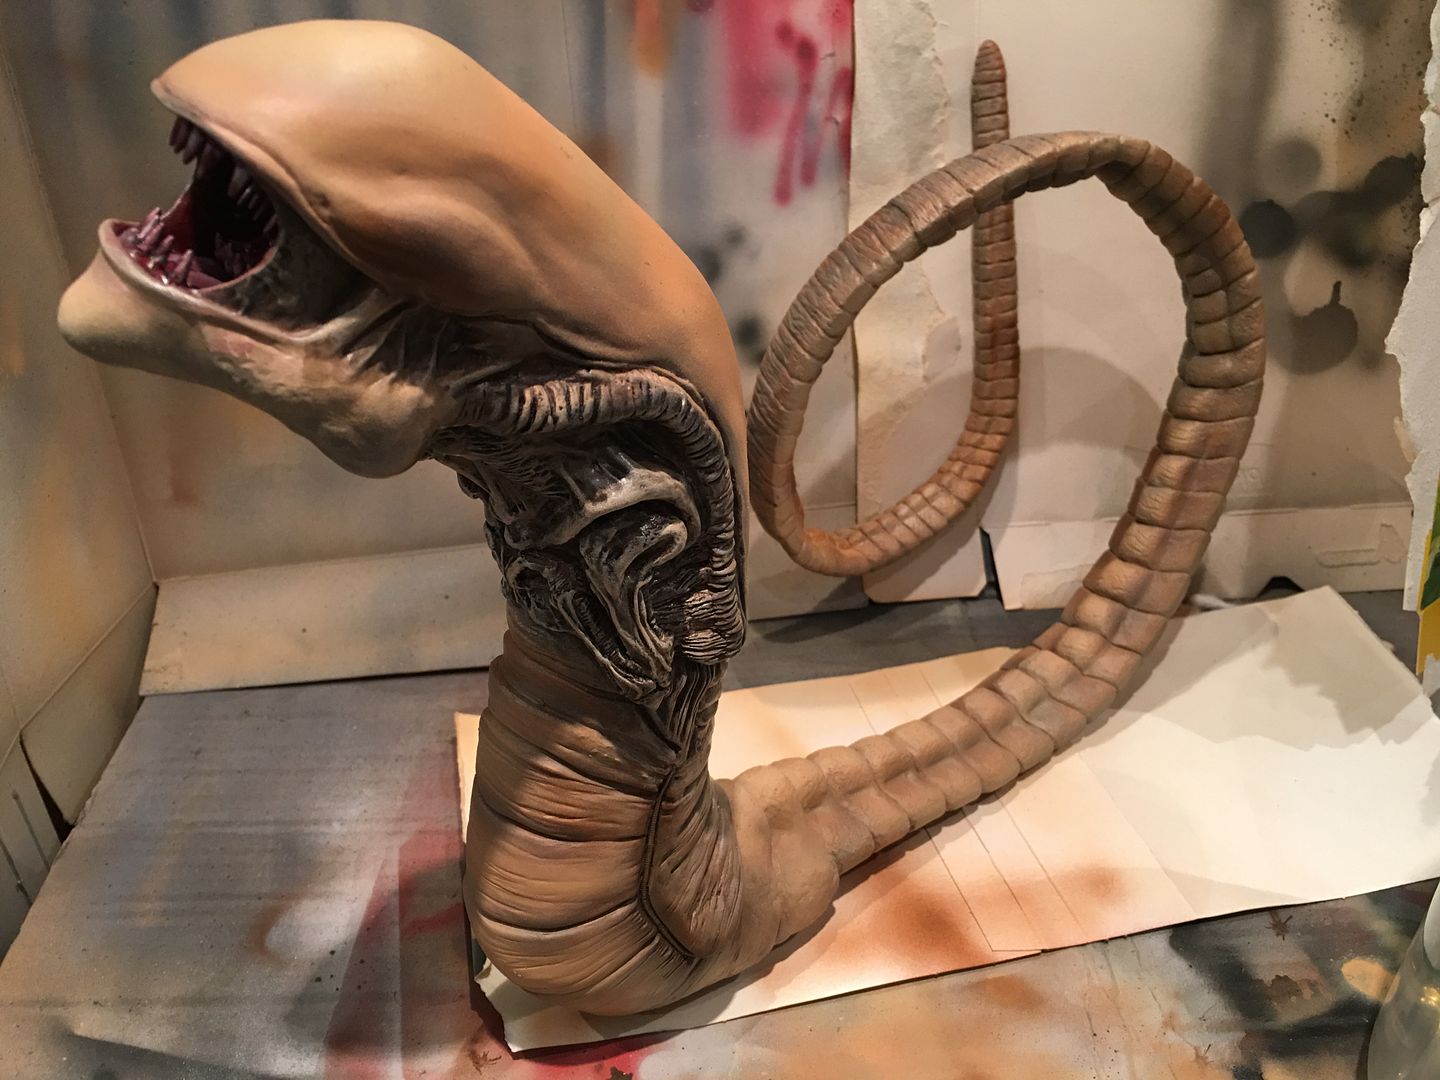
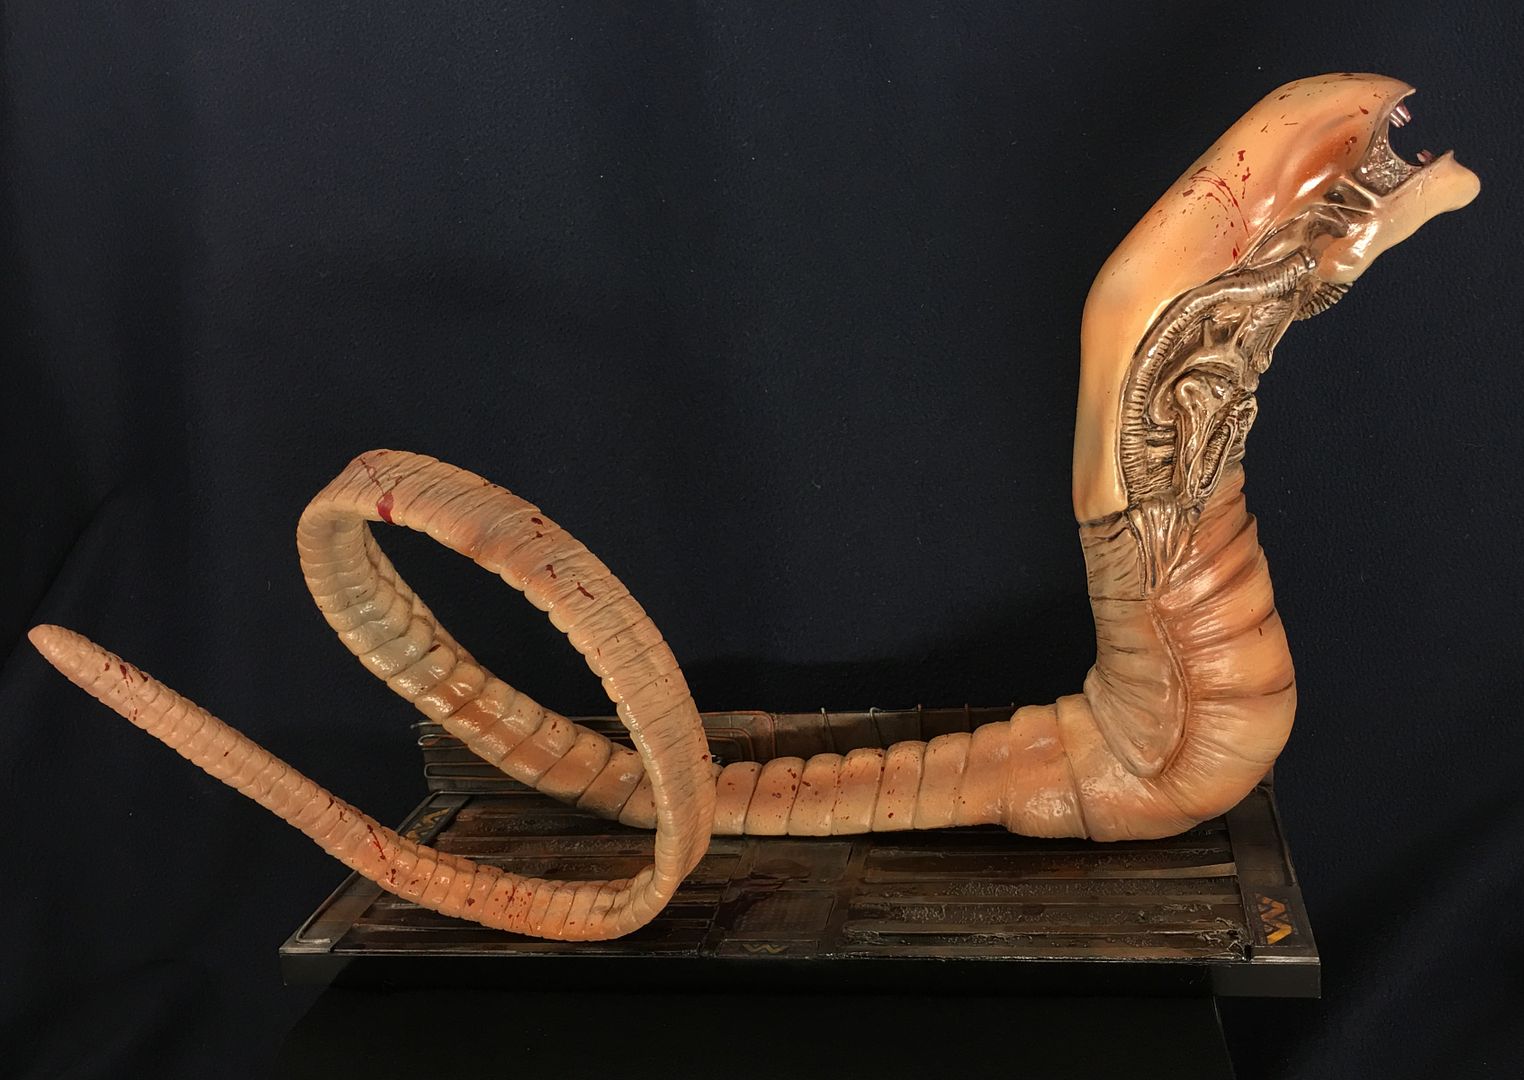
I also reshaped the tail into a loop-the-loop coil, which solved 2 problems: it made the model shorter and easier to position on a diorama, and secondly it gave the model 2 points of contact on the base. This was surely going to make it easier to stand up, right? The wire helped, and any splits in the putty joins were easily fixed.
It was about this time I started on the diorama base. I knew I wanted something grungy and industrial, with some Weyland-Yutani 'company' logos, and blood. Plenty of blood. This isn't a friendly alien beastie, after all.
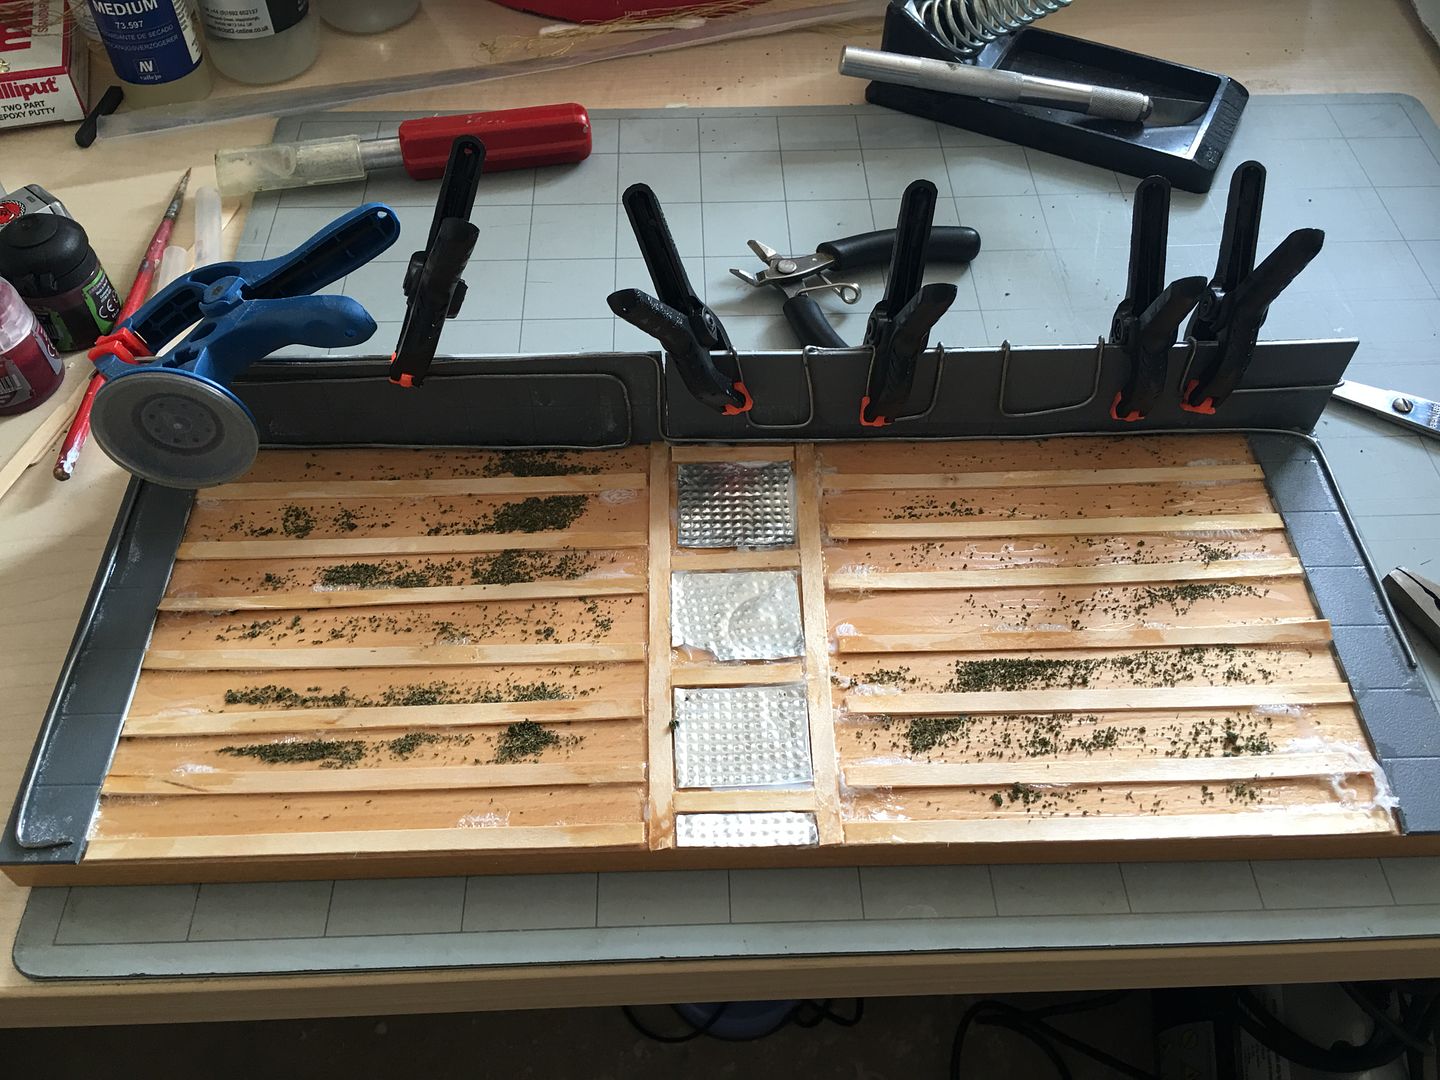
Ikea to the rescue! A shelf from a CD unit was the right size to stand the Chestburster on. Some plasticard, wire and Starbucks coffee stirrers, and we had a start. Yes, at this point it looks like a shelf with a bunch of crap stuck to it. My wife even squinted at it and asked "is that it?"
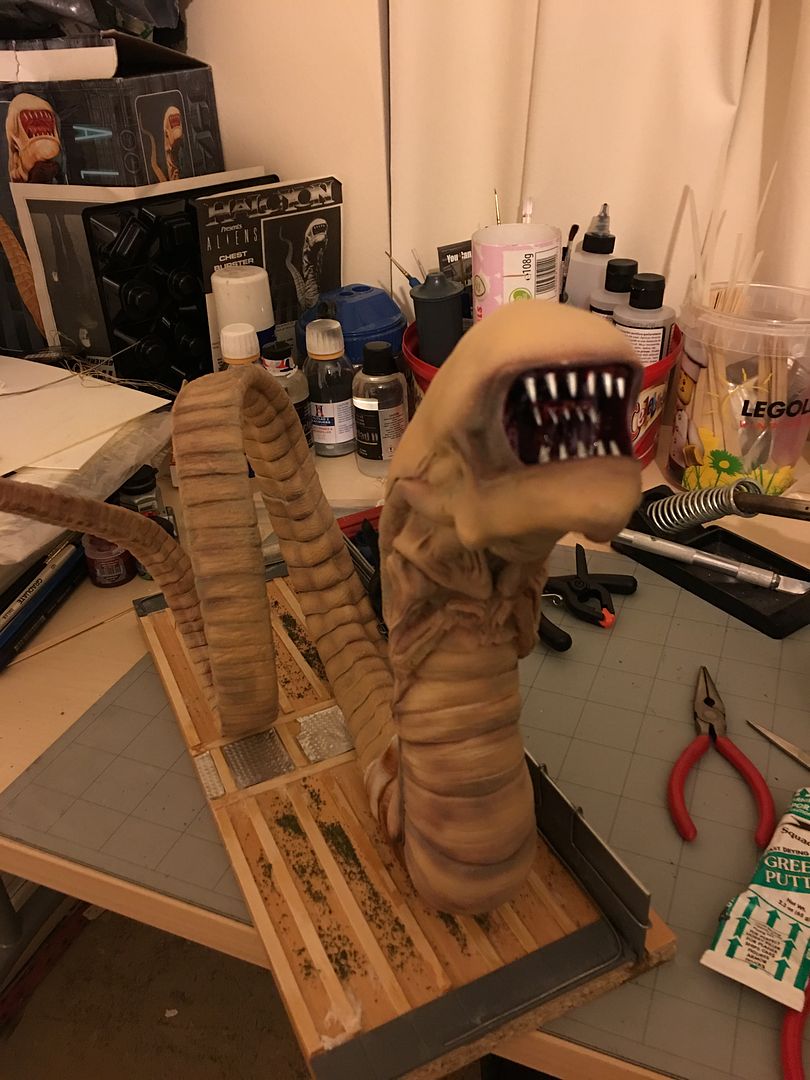
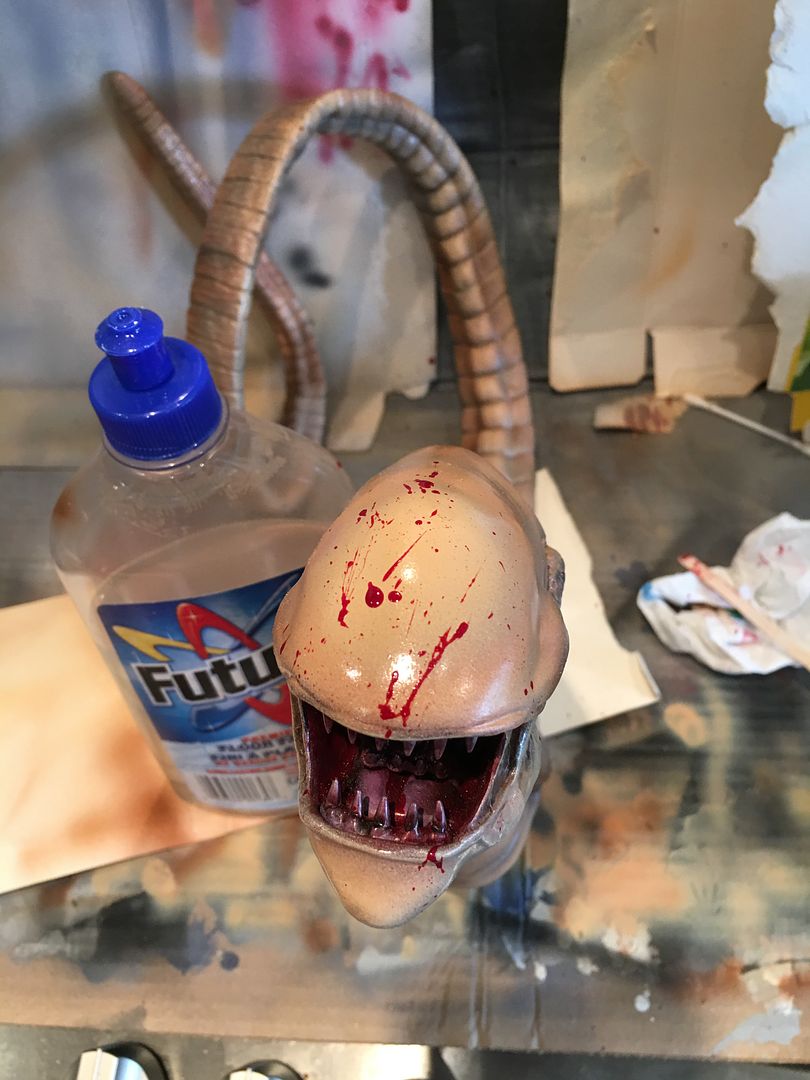
At this point, it's worth seeing the beastie in situ - we've seen that it fits, and checked that the curled tail is appropriate for the scene. This test fit will determine if the colour palettes are compatible in a practical way, what needs highlighting, and what areas need more detail.
It could still do with some more 'pop'. Let's drybrush highlights on the body and deepen the wash tones here and there...

Repeat where needed, and get a really wide contrast between the shadows and highlights. Spray, drybrush - whatever it take - and seal with Future. A matte or satin coat will dull down the shine.
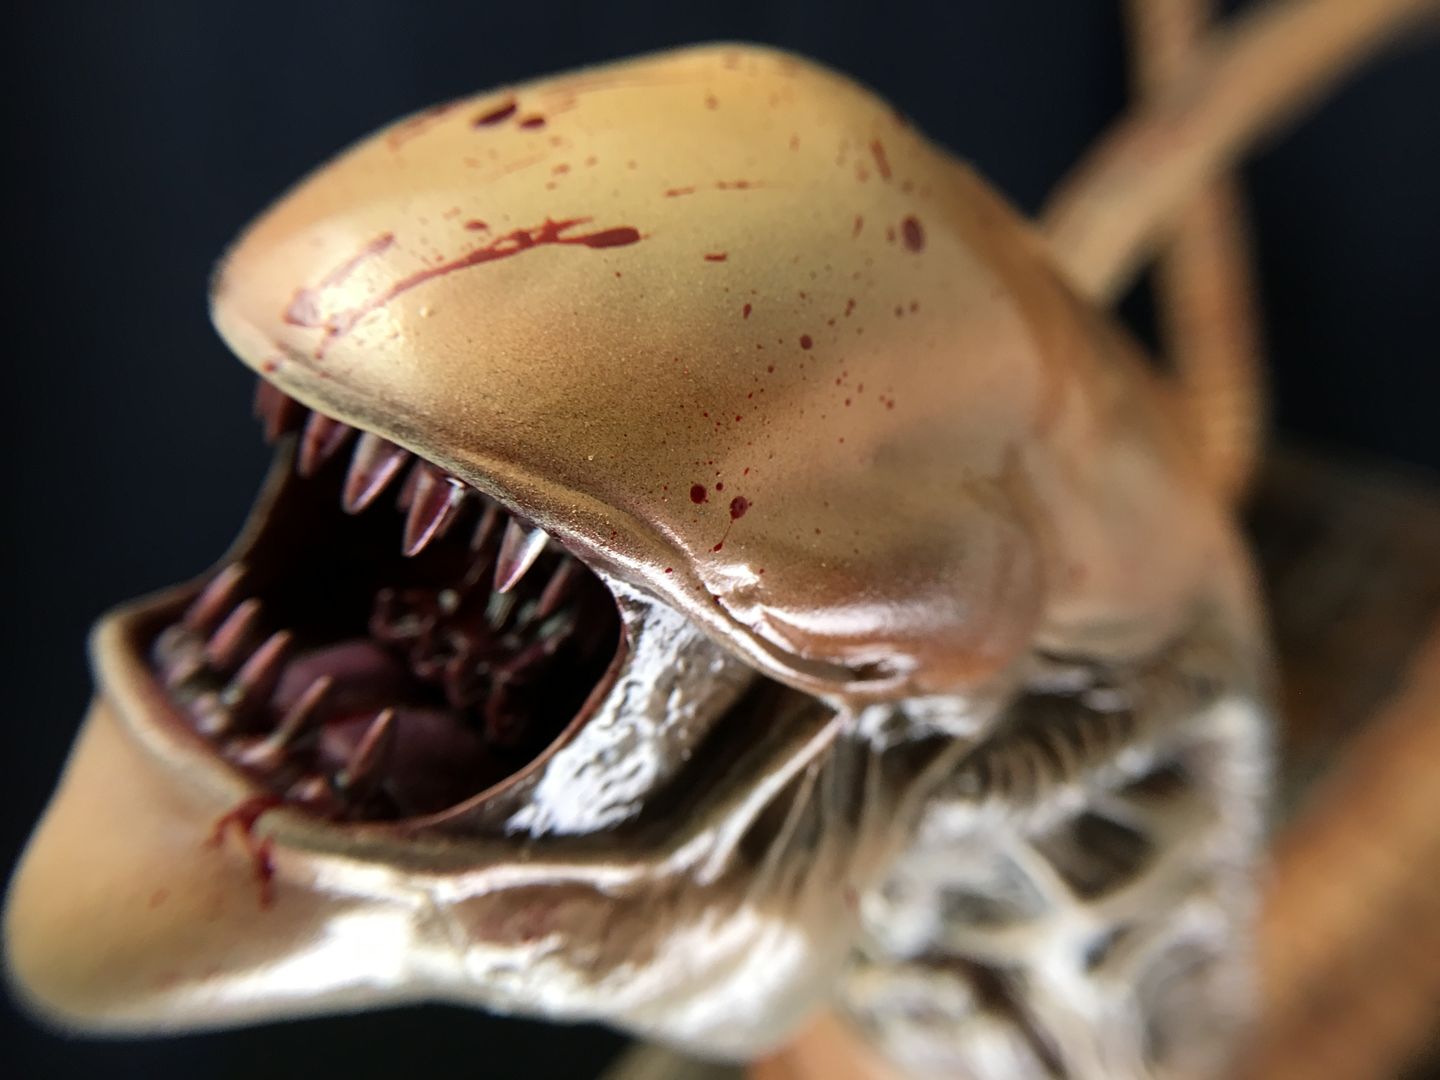
Bloody up the mouth. Blood for the Blood God is a great technical paint for this job. It's thick, sloppy and glossy. You could probably make your own with other paint medium, but realistic red gloop, you can't get any better.
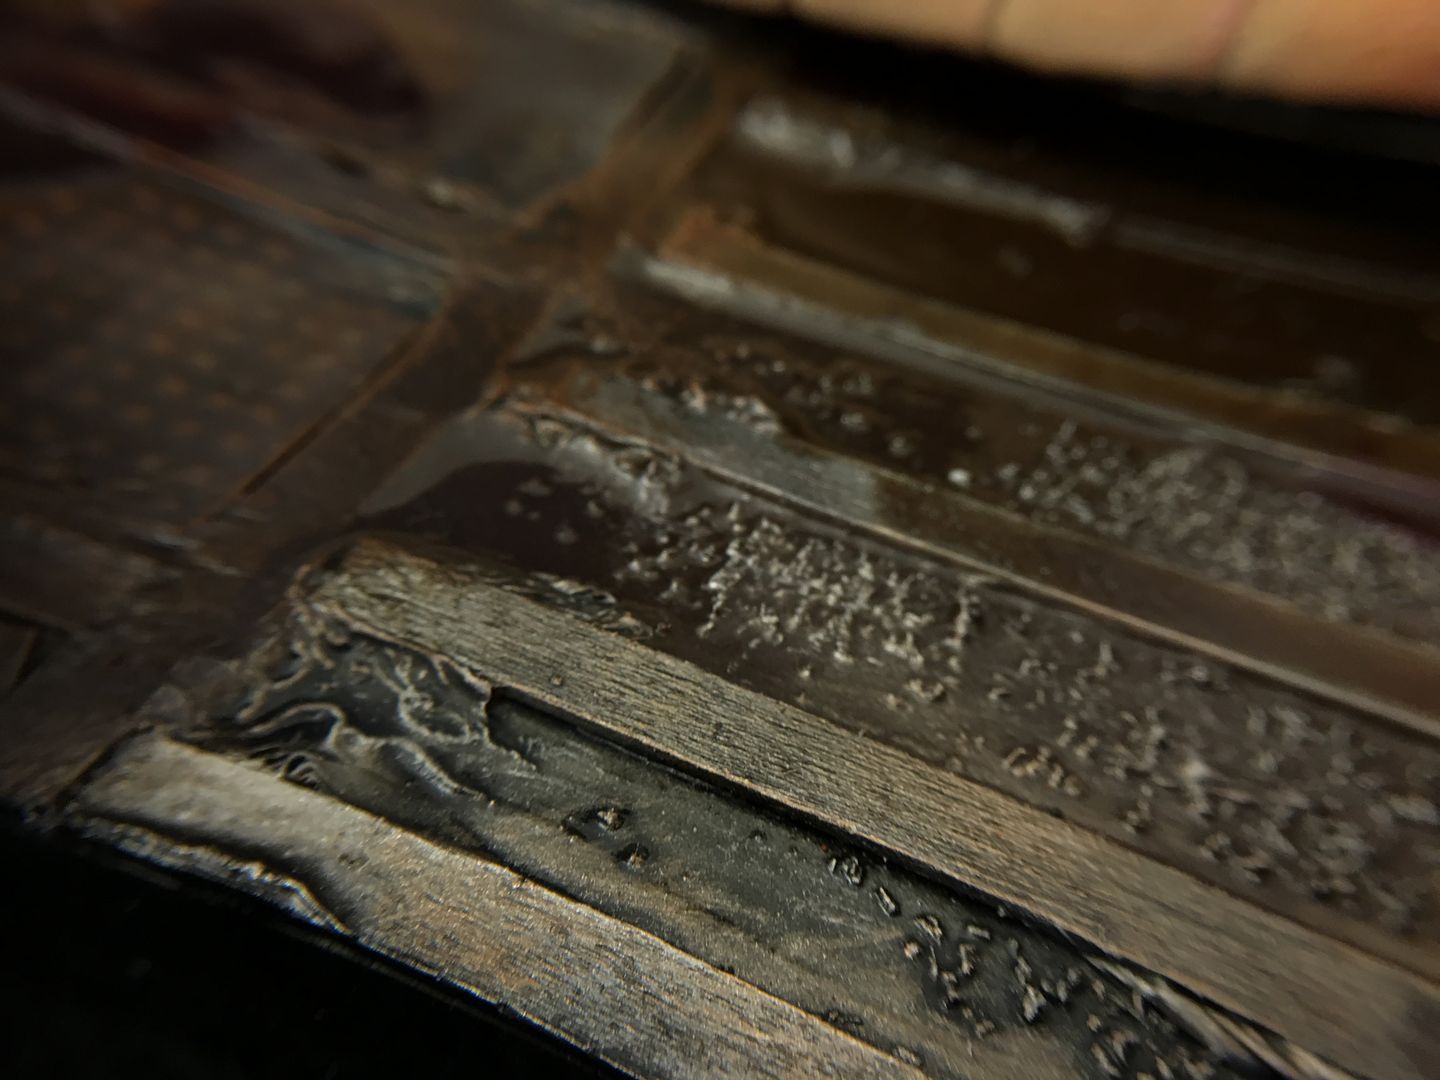
Back to the base, then. I washed large portions of the thing with Army Painter Quickshade (Strong Tone), and allowed it to dry. It took a couple of days, but gave a really good oil spill. Just to make sure, I recoated matte and satin over areas I didn't want shiny. Then, I mixed up some Woodland Scenics Water Effects with various shades of red, brown and purple and dripped over the base in areas where the Chest Burster would have been. Gore and oil: great textures.
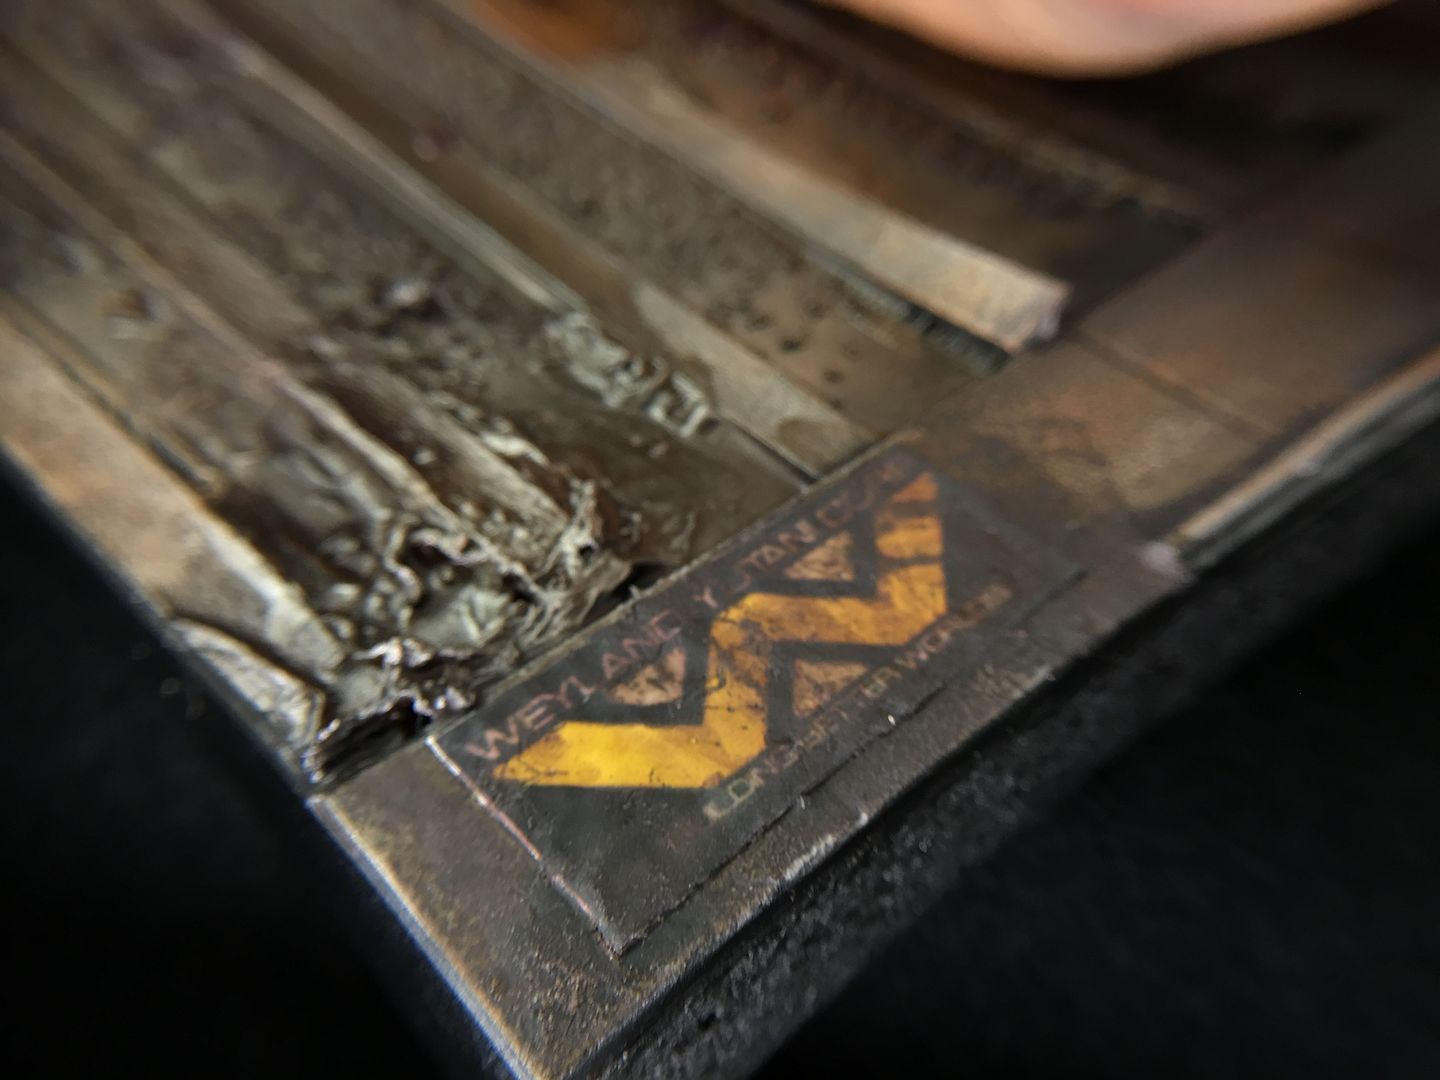
Last bit on the base - the logos. Using the same technique as on my Alien3 xeno, I glued some Weyland Yutani logos onto metal foil and cut them out. Sealed with matte varnish.
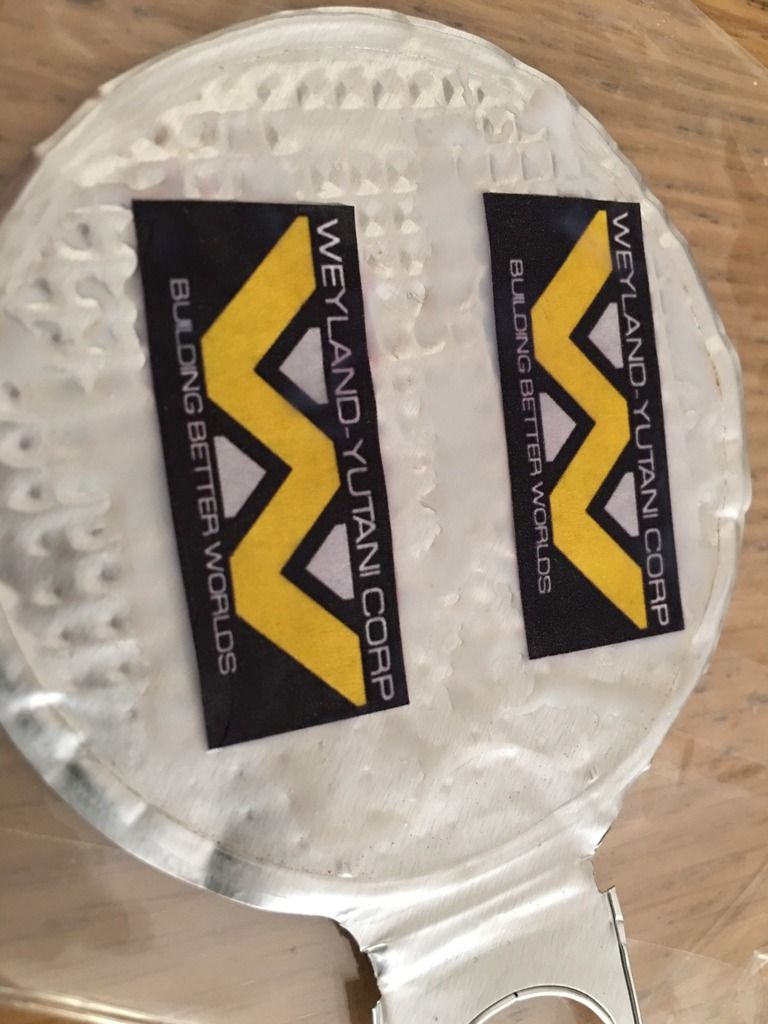
Yes. That was a coffee tin vacuum foil. Anything goes in the world of scratch building.
Once glued into place, I applied Typhus Corrosion and Ryza Rust, Nuln Oil, and the sealed with gloss and matte varnishes. I stuck a sheet of felt to the bottom of the base, and black-glossed the edges
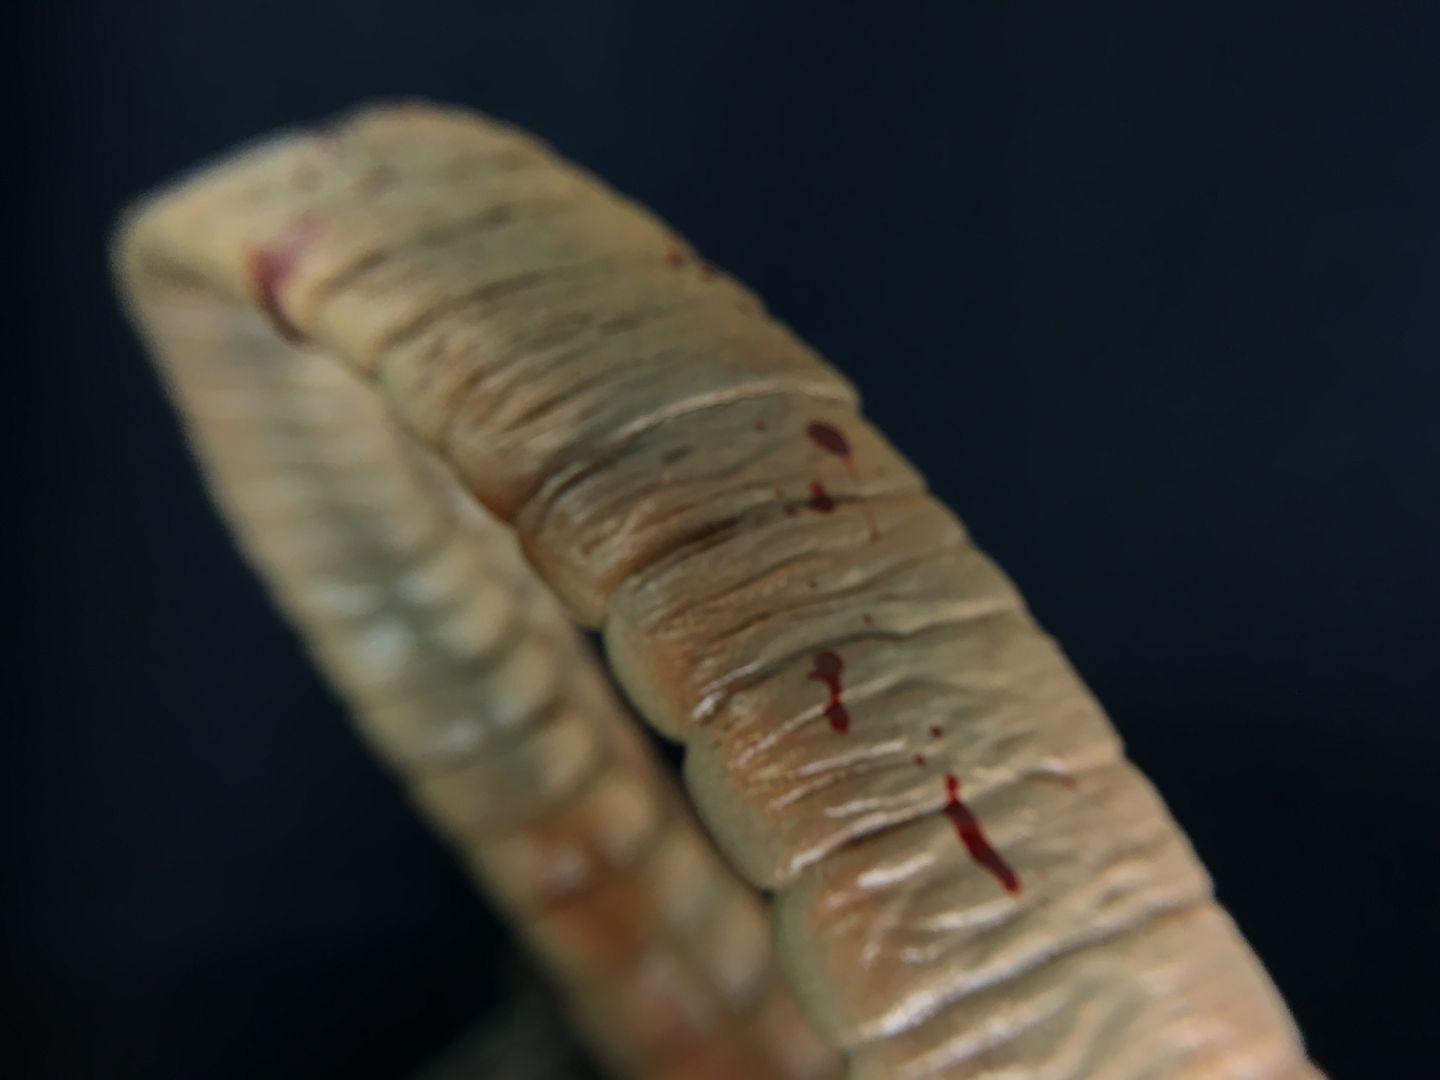
And the final bit on the bug - blood spatter. A great technique, but you'll need your wits about you: dip a flat brush (an old toothbrush works, too) in Blood for the Blood God, and using a wooden stick, spray the model's surface with the paint. It goes mostly where you want it to, but also all over your clothes and face.
I'm imagining that after exiting the host body, the burster will have lost the initial smear of 'afterbirth' quite quickly, running around the air-ducts and tunnels of wherever it now lives. It still needs to feed, so there are probably rats and other small mammals it can eat, and they'd spray blood directly at it. Good thing I used to watch Dexter, eh?
I sprayed other blood over the whole body and tail, for consistency, and then checked it over to see what I missed.
Then photos.


And that's all folks! I got to build an awesome kit, got paid for it, and had a lot of fun doing it.
Comments and questions are always welcome - either on here or on Twitter.
Until next time...
I love a good preshade. You can go absolutely nuts with related tones and you'll get a really natural feeling result on the top coat.
Of course, before the teeth went in, I painted the inside of the mouth. It looks waaay too OSL-y here, but there's a reason for it.
And while everything on the body is drying, it's time to sort out the teeth. Primed in grey, sprayed in VGA purples, and finished (teeth only) with Citadel Mithril Silver. They'll have more done once they're in place, but there's no point trying to get silver around the back of spiky things once they're glued in.
A test fit, just to be sure.
But how do we solve the problem of ballast, without filling the whole tail with plaster or resin. There's no one 'right' way (loads of wrong ways, though), and what I ended up doing was using the spindle from a roll of Mod-Rock, and wrapping it in paper and Mod-Rock. This fitted across the joint from the body and the tail.
I also reshaped the tail into a loop-the-loop coil, which solved 2 problems: it made the model shorter and easier to position on a diorama, and secondly it gave the model 2 points of contact on the base. This was surely going to make it easier to stand up, right? The wire helped, and any splits in the putty joins were easily fixed.
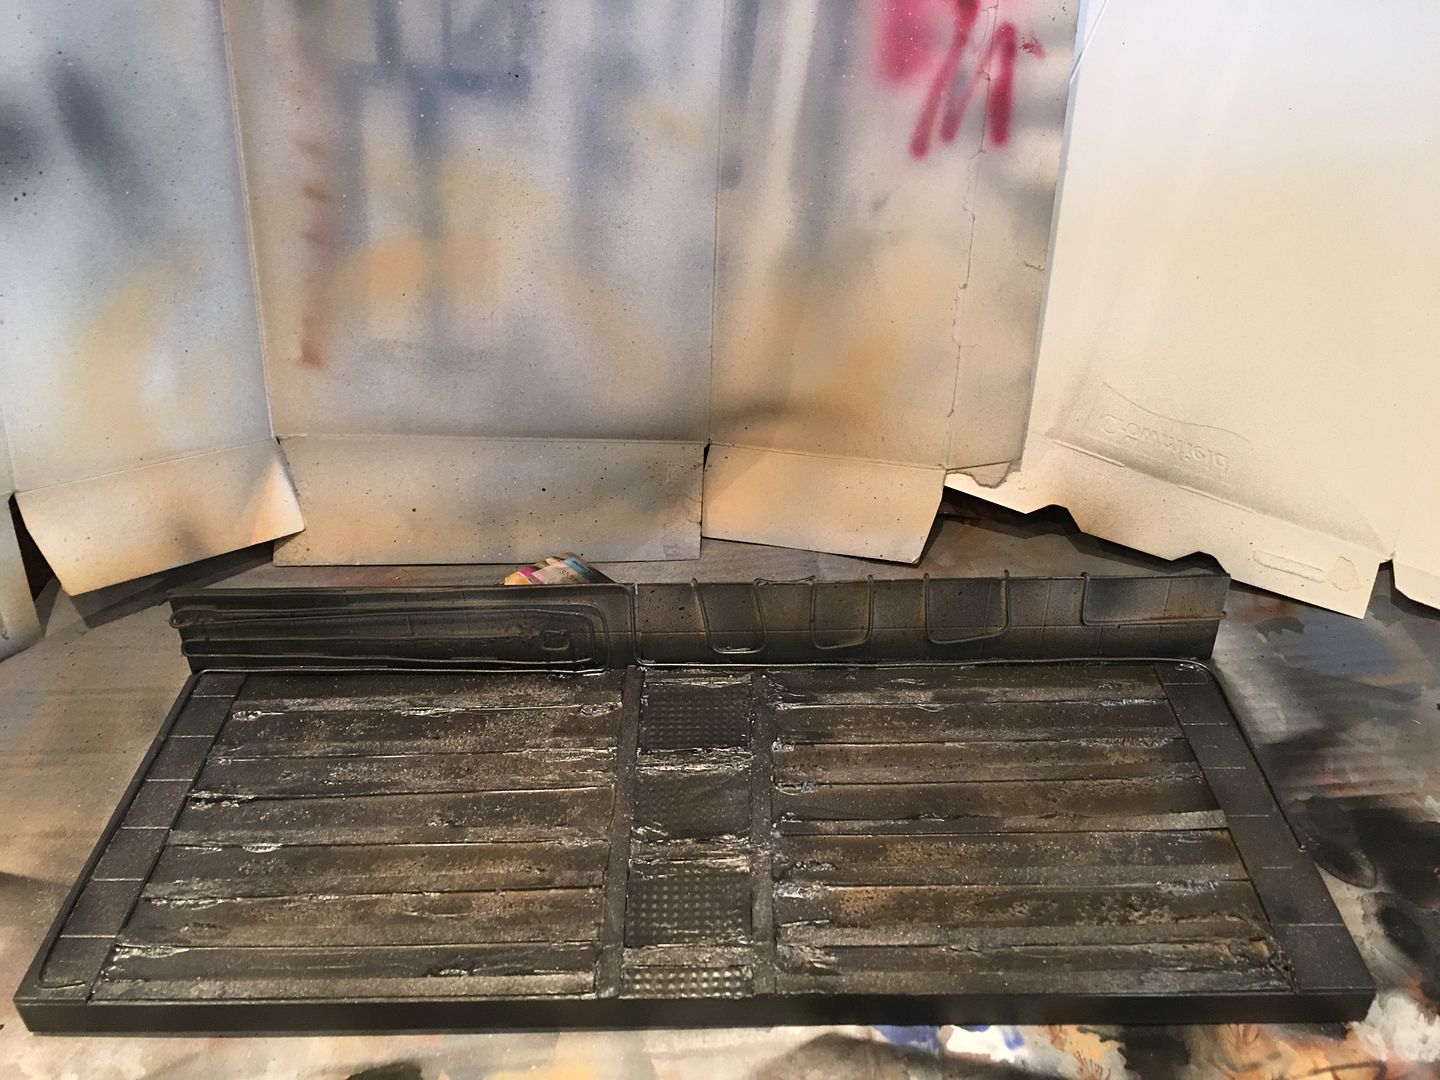
It was about this time I started on the diorama base. I knew I wanted something grungy and industrial, with some Weyland-Yutani 'company' logos, and blood. Plenty of blood. This isn't a friendly alien beastie, after all.
Ikea to the rescue! A shelf from a CD unit was the right size to stand the Chestburster on. Some plasticard, wire and Starbucks coffee stirrers, and we had a start. Yes, at this point it looks like a shelf with a bunch of crap stuck to it. My wife even squinted at it and asked "is that it?"
No. We don't stop there. That's just the skeleton. I guess this is why you should never show anyone who doesn't do the same kind of work any early WIP stages! Here's a quick test fit.
I primed the base in grey and then got the Alclads out. Black basecoat, and the last of my Magnesium lacquer to cover. Washes, metal drybrushing, GW Typhus Corrosion (amazing paint) and Ryza Rust gave the base its first major look of filthy tone. Seal it with all the lacquers and varnishes. Leave to dry.
At this point, it's worth seeing the beastie in situ - we've seen that it fits, and checked that the curled tail is appropriate for the scene. This test fit will determine if the colour palettes are compatible in a practical way, what needs highlighting, and what areas need more detail.
It could still do with some more 'pop'. Let's drybrush highlights on the body and deepen the wash tones here and there...
Repeat where needed, and get a really wide contrast between the shadows and highlights. Spray, drybrush - whatever it take - and seal with Future. A matte or satin coat will dull down the shine.
Bloody up the mouth. Blood for the Blood God is a great technical paint for this job. It's thick, sloppy and glossy. You could probably make your own with other paint medium, but realistic red gloop, you can't get any better.
Back to the base, then. I washed large portions of the thing with Army Painter Quickshade (Strong Tone), and allowed it to dry. It took a couple of days, but gave a really good oil spill. Just to make sure, I recoated matte and satin over areas I didn't want shiny. Then, I mixed up some Woodland Scenics Water Effects with various shades of red, brown and purple and dripped over the base in areas where the Chest Burster would have been. Gore and oil: great textures.
Last bit on the base - the logos. Using the same technique as on my Alien3 xeno, I glued some Weyland Yutani logos onto metal foil and cut them out. Sealed with matte varnish.
Yes. That was a coffee tin vacuum foil. Anything goes in the world of scratch building.
Once glued into place, I applied Typhus Corrosion and Ryza Rust, Nuln Oil, and the sealed with gloss and matte varnishes. I stuck a sheet of felt to the bottom of the base, and black-glossed the edges
And the final bit on the bug - blood spatter. A great technique, but you'll need your wits about you: dip a flat brush (an old toothbrush works, too) in Blood for the Blood God, and using a wooden stick, spray the model's surface with the paint. It goes mostly where you want it to, but also all over your clothes and face.
I'm imagining that after exiting the host body, the burster will have lost the initial smear of 'afterbirth' quite quickly, running around the air-ducts and tunnels of wherever it now lives. It still needs to feed, so there are probably rats and other small mammals it can eat, and they'd spray blood directly at it. Good thing I used to watch Dexter, eh?
I sprayed other blood over the whole body and tail, for consistency, and then checked it over to see what I missed.
Then photos.
And that's all folks! I got to build an awesome kit, got paid for it, and had a lot of fun doing it.
Comments and questions are always welcome - either on here or on Twitter.
Until next time...

