The Tau XV9 is a gorgeous little kit. The resin is easy to work with, the moulds are sharp and detailed, and have few production mistakes to worry about. Those that do exist are easy to fix. It does take time to prep well, though, and the usual cutting and sanding tools are needed - nothing fancy required here. There are mould lines and loads of flash and pour-hole lumps. There are a lot of pour-hole lumps. I've heard that on the larger kits, these lumps take up about 10-20% of the packaged weight. That's a lot of wasted postage...
This kit is small, though, and quite lightweight. I'll start with the main body cleanup, and then the head and upper arms. The lower arms have the guns attached, and I'll leave them until last. Back-scraping with a scalpel and brushing away the dust achieves 90% of the cleanup. After a decent soapy wash and dry, I've opted for a combination of green-stuff and CA glue to give short-term adjustment, and long-term strength.
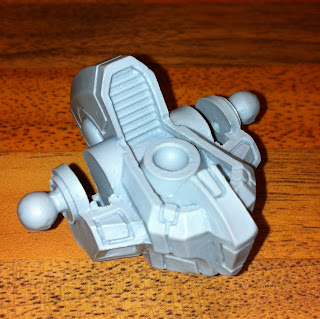 |
| Mould-lines are easy to remove |
Getting the pose right is the hardest part of any build. You don't want a flat, disinterested figure to work on, so do as the boys at Pixar do and try out poses in front of a mirror. Check how your 'rigging' changes if you lean one way or another, and the result will look natural and realistic.
 |
| Staring at yourself in a mirror gets results |
The lumps of resin left over from casting do have their uses, however, and while the green-stuff is curing, I'll get on with the base. Gluing cut-up pieces of random resin to the plastic base gives a basic topography that can quickly be covered by Mod Roc and scatter for texture. Here, some resin is poking through, and this will be painted rusty, as if it's old wreckage worn over time.
 |
| Resin leftovers from other kits are handy, too |
in part 3, I'll pose the legs and get the arms in place. It's a juggling act, though...


No comments:
Post a Comment