Saturday 3 March 2018

Using Cricut cutting machines to create masks (sponsored)

Hey ho - here's something a bit different. Just so you're aware upfront, this is an unpaid sponsored post with some affiliate links.

Towards the end of last year I was contacted by the UK reps from Cricut. They asked if I was interested in trying out an Explore Air cutting machine for some modelling work. You'd normally find Cricut machines in papercraft studios - for making cards and decorating gift wrapping etc. I don't want to sell that hobby short at all. There's a lot of amazing projects that come out of that hobby barn, but it's not a common thing to see one being used for scale models or wargaming.

Cricut Explore Air, plus a bunch of tools I won't need.

And that's what Cricut wanted me to figure out - how can I do something cool with this fancy tool that isn't standard or run-of-the-mill.

I'm in the middle of an X-Wing fighter build for a Facebook group build, and I thought I'd get the Cricut involved with creating some masks to help speed along the difficult bits.


Pro Painted 1:72 figure. eBay quality.

The first thing I'm going to use the Explore Air with is the canopy. Ban Dai provide stickers in the box as alternatives for the decals - not everyone building these snap kits is comfortable with working with decals - but some are also useful for masking.

This is perfect for testing the viability of the Cricut for the job. I already have vinyl masks in the form of the canopy stickers, so I can copy those and learn to use the cloud-based Cricut Design Space software.

Ban Dai stickers, ready to be scanned
I scanned the canopy frame sticker, tweaked it in Photoshop, imported it to Cricut Design Space, and double-checked the actual size for cutting.

Photoshopped masks x2 for safety

Once I had the cutting file ready, I went and found some self-adhesive vinyl sheet on Amazon - it doesn't matter which colour you get (it's getting painted over) - and loaded it into the Explore Air.

Take a look at the video - I've filmed the whole cutting process, as well as the preamble and painting.


So that's vinyl cutting using the Cricut Explore Air. I have other plans for masks, too, including some complex aztec patterns for the AMT Enterprise-D. I'm figuring out how to share the files, so that other Cricut users can benefit from this test as well.

Thanks for stopping by - there's more to come, as well as an interesting team-up that's on the horizon.

Thursday 14 December 2017

The slowest year in living memory

I'd like to think that I'm nearing completion on this Gremlin project. I haven't taken on any other commissions since starting it, and I've been really feeling the project fatigue.
Not that I've been working on it 24/7 for any of it. The beginning was, as always, exciting, daunting and full steam ahead. New tools, new methods of accomplishing difficult tasks, and then a whole load of unforeseen events reared their ugly heads and hindered progress.
I’ve learned about mixing expanding foam; about large wire skeleton structures; about not taking on a giant project when you’ve just moved house.
I think maybe that’s been the biggest issue - there hasn’t been the space to work properly. My workbench has often been ‘wherever I lay my brush’, but when you’re dealing with a 28” tall gargoyle, yout can’t easily stash him on the shelf while you set the table for dinner.
The house move has had added timesinks - laying new floors (I’m pleased to have learned to fit carpet and lay wood-laminate floors), building a workshop/shed/studio (I learned some intermediate electrical skills, as well as ‘simple’ construction work), and we added a dog to the family, which might be a blessing or a curse - a year on, I’m not convinced either way. Incidentally, a massive project for next year is to sort the landscaping in the garden that the dog has helped reshape. The Gremlin, too had a few accidents: a couple of nasty falls, which broke strong joints, and ripped the internal foam holding it together.
I’m basically a Gremlin surgeon now.
There have been personal ups and downs too - family bereavement, redundancy, marriage wibbles, mental health issues - but with 2017 about to close, I think I’m back on track. And I don’t want to out too much importance on the Gremlin, but if I can deliver it to the client before Christmas, then I can start 2018 afresh - no baggage (well, less baggage)
Things I’m looking forward to? I’m in the final stages of setting up a Patreon page, and planning new content for my sleepy YouTube channel. The shed/studio is up and running, so I’m keen to share project builds with the world. I may stick to smaller, more easily attainable subjects, though - perhaps the 1:1 Brontosaurus will stay in its box for a little while
longer.

Thursday 13 July 2017

Alien Escape at Madame Tussaud's

In my former existence as Video Editor at Stuff.tv, I would be invited to attend/film a great many events - a fair number of these weren't relevant to the magazine or website, so it would either be a jolly, or we usually wouldn't even go.

When I received the email about Alien Escape, however, I jumped at the chance. Who cares if they're covering it at my (now) old job...? You might have noticed a bit of Alien coverage here at MiniModelPaint.com over the years. I'm a tad obsessed.

Alien Escape is a micro interactive installation, contained within the classic Madame Tussaud's attraction, and puts you in the universe of xenomorphs onboard the USSC Covenant.

After a photo op with Walter - one of the more lifelike waxworks I've seen at Tussaud's (android irony withstanding) - you're led through a series of spaceship corridors, encountering eggs, facehuggers, dead crewmembers and just enough shock-scares to get you through to safety.


If there's a criticism, it's that it's too short and too fast - I found that there wasn't anywhere near enough time to look at the exquisite modelling work that has gone into the installation. Just look at this:


In my mind, that's living the dream - getting paid to build full-size monster models full-time. Nice that some of us can do it part time - even if it's mostly to a smaller scale...


Alien Escape is open from July 15 at Madame Tussaud's, and is included in the price of entry to the whole attraction.


Disclaimer: I didn't get paid to write this, but I did drink a lot of their booze...

Sunday 9 July 2017

End of an era; gateway to the future

So it finally happened.


After nearly ten years in the most slowly-progressing McJob ever, the company decided that there actually wasn't anywhere for me to go, career-wise, so they made my post redundant.

No doubt it'll be refilled in a few months' time by a cheaper junior with a completely different title, and slightly tweaked job spec, but put a fork in me, I'm done!

But it's not doom and gloom in any way. It means I'm now able to offer my video services on a freelance basis; I can spend more time with my kids, and I can spend some proper time with this here hobby.

I've been progressing slowly on the Gremlin - it's been 2 steps forwars, 1 back a lot of the time. This weekend I repaired the wrist and arm breaks that happened (thanks go to the dog), but in doing so, I broke the join on one of the ears.

I'm going to have to build a simple jig to hold the Gremlin in various positions - without resting his weight on anything but his feet.

Next on the to-do list is reshaping and fitting the mohawk spines to the head and down his back. They're an awful fit, so I have some filling and blending work to sort there, too.

Then it's just a case of finishing the paint. Match up the torso and the head for contrast and tonality, fix the chips that happened wheb he fell, and get the details dotted in.

But can I do this before the kids finish school for the summer? Here's hoping. My poor client must be fuming by now... sorry chap.

Monday 22 May 2017

If you build it, they will come.

Greetings, people of blog land.

I sit typing this, rocking on my garden chair, my dog asleep on a patch of soil in front of me, and my lovely wife clattering in the kitchen behind me. Maybe I should be helping her.
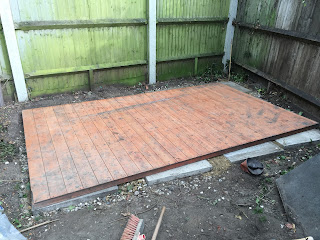
As I swing, however, I'm distracted by the large blue structure in front of me - and also the wasteland that used to be a nice, well-manicured lawn - but mostly the blue structure. Some would call it a shed; others a money-sink. To me, though, it is the promise of something good: a blue wooden box with infinite interior space for ideas and creativity.

The build went a little something like this:


Dig hole, lay sand, gravel, scrape and level, drop flagstone on foot.

REPEAT until nearly dead.


Place flooring down and test for see-saw action


Add the walls and roof, and test stability with child and dog. Helmet, because it's a building site.

Wait for a week, remove the lot. Realise that the floor has settled and not as level as before.

REPEAT first step. Swear at the floor a lot (it doesn't actually do anything to help the build, but it's cathartic, therefore, important).

Read instructions, and, using a dad-type with power tools and a working hammer, build the outside.


Friday 28 April 2017

Learning to say 'no'

One of the most important things to learn as a commission painter (or freelancer in general) is how to, and when to, say 'no'.

Not 'no problem - I can finish that custom Battlesuit diorama by the end of the week', but 'no. I can't take that on right now'

Sometimes you need to employ the same methodology with yourself. This week I had the usual newsletter from Wonderland Models, telling me about their massive discounts on stashable plastic. I usually scroll through and hit delete.

In this missive, however, something caught my eye: Dragon's 1:35 Patriot SAM Launching Station (PAC-3) - down from £84.99 to £29.99

I did some extra digging to figure out just why this would be a near-£100 kit. I'm not an armour expert, and the only previous experience I have of this price range is Games Workshop's medium-sized robot-suits, like the £90 Tau Stormsurge.


Look at this! Detail, size, poseability! £90!

Now look at this:


Detail. Size. Poseability. £90. No - now it's £30.

I

MUST

HAVE

THIS

KIT


(To be fair, I'm not trying to belittle GW's product - it's made for playing a game, and is way more durable than Dragon's display model. But it is pricey)

My internet trawling tripped me up a few times, as Dragon has a larger kit with the tractor vehicle as well as the missile launching trailer. Trumpeter has a similar giant kit for about £80, but has photoetch parts as well as plastic sprues.

Fancy.

This kit, though is just the trailer. Still a lot of kit for £30. Very tempting.

But I must resist. It's taken me a good day away from a computer or phone to get some perspective. Shortage of funds, limited storage, other projects - all of this is saying I have to spend my money elsewhere.

Like finishing my new workshop/shed - that £30 will go a long way to buy gravel and sand, so the ground and the shed are level!

And this is where I realise that I need to say 'no' to myself, too. I can't take on this project at the moment, and even if it looks like a great deal, the model isnt something I'm desperate to have in my stash.

When Wonderland has another sale on a big kit, I'll consider it - but only if my shed is done...

Tuesday 14 February 2017

Gremlins 2: A New Batch of Glue

This here monster takes a lot of sticking.


I'm using 2-part epoxy for long-term stick, CA for quick adhesion, and Milliput to fill and strengthen the gaps.

I've already talked about filling the inside with expanding foam, and the importance of making sure the holes are properly sealed.

Thankfully I caught this before mixing up the foam. Nothing like wasting expensive chemicals and having them pour all over the kitchen counter! The cleanup on the model detail would also be a pain. Foam is fluffy and sticky, and not great for cutting. It is good for keeping things structurally sound, though.

This vinyl kit, as mentioned before, has a few issues. It's a repop (yuk) and certain aspects haven't translated well in the copying process. The mouth, for instance, has some weirdness between the lips, which needs heating and cutting, and maybe resculpting.

Likewise, the elbow joints are unwieldy. Either one side fits well, or the other. I'm not exactly new to reshaping vinyl under heat, but this kit has not been quality controlled like the original Kaiyodo would have been. Shame, but then that's what separates us from the snap kitters.

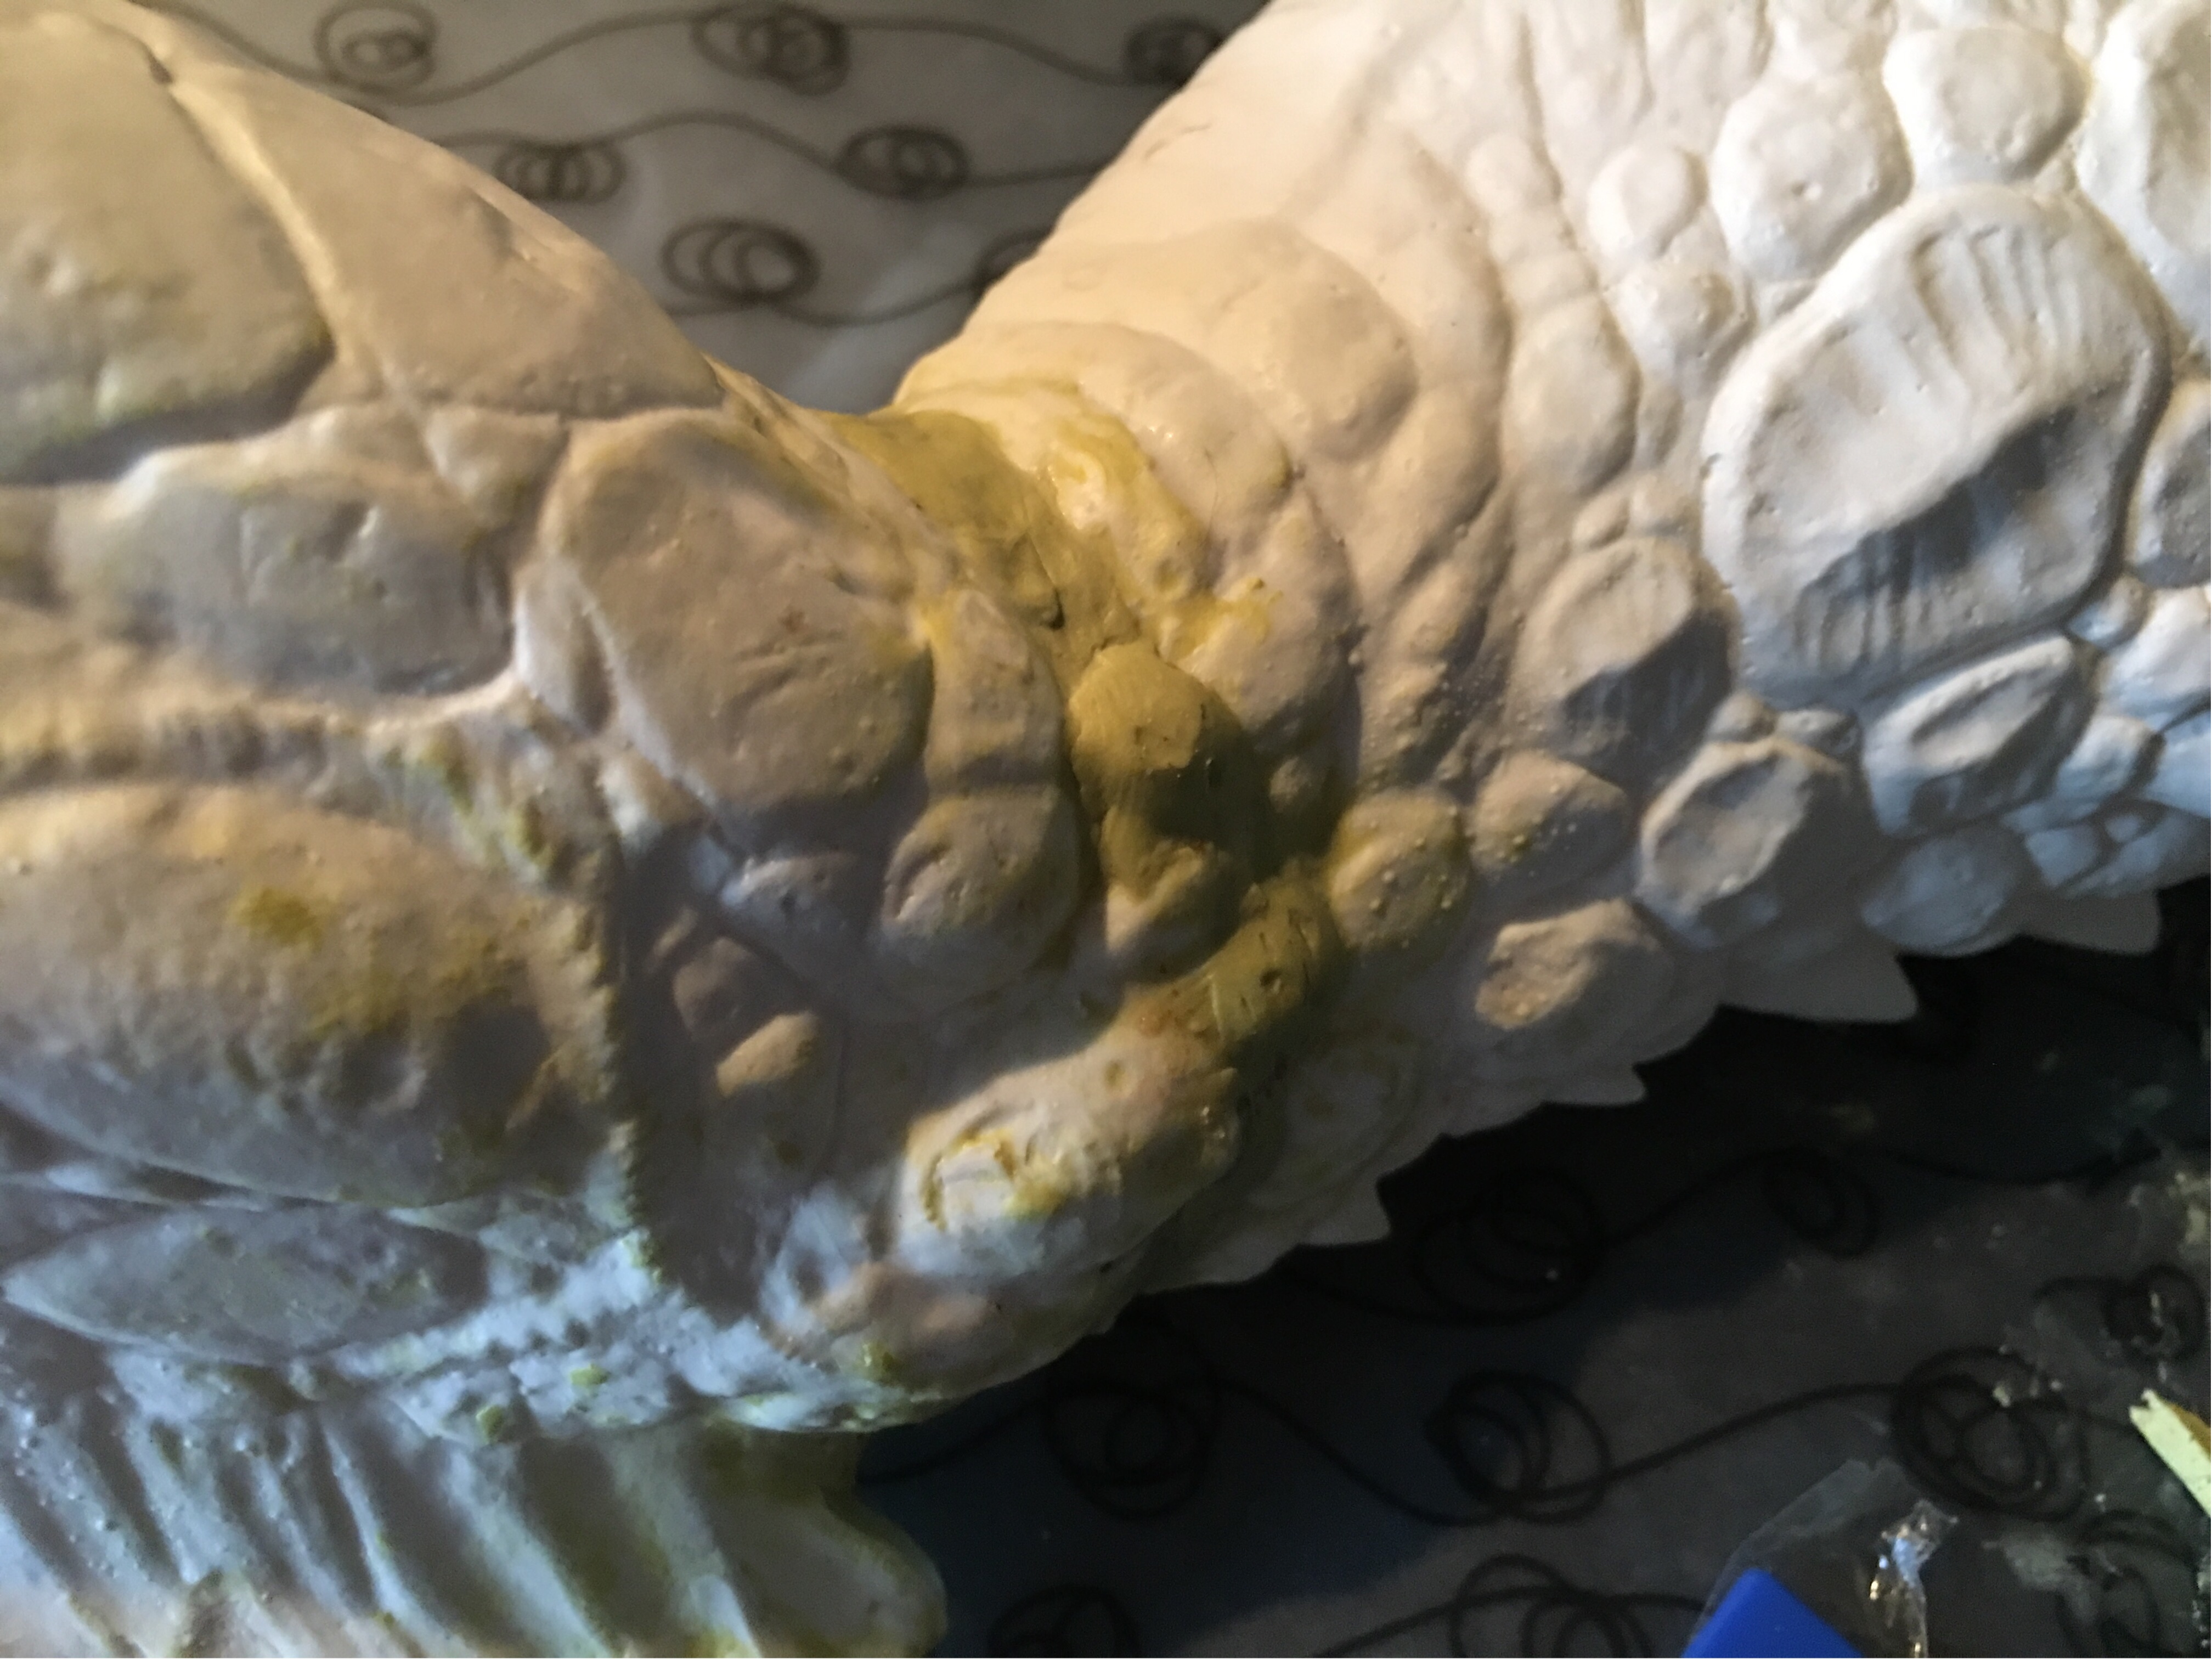
Here you can see what used to be a massive gap, filled with Milliput. In addition to the standard filler work, however, I've added some scales to match the surrounding details, and textured the 'smoother' areas by pressing the other arm into the Milliput to match the surface detail. I'm not a sculpter by any definition of the word, but blending in these failures in the repop kit will help sell the idea of realism to the eventual audience.

And that's what we do, right? Try and sell the idea of realism in a medium that's not realistic?
How many times have we looked at spaceship kits, or 40k minis, and said 'how can I make this more realistic'?

So the kit isn't exactly as planned, but it'll be structurally solid, and it won't fall over when it's done. It looks good, and even on close inspection it looks consistent within the world it's set in.

And that's the compromise. Do we make it work, regardless, or try and stick to the original intention of the kit designer?

Hopefully both, but if there's wiggle room, I think it has to be in favour of the builder, and artistic interpretation.

The other arm didn't have as many issues. Who knows why? I didn't have to sculpt scales - only some textured filling.

But that, I guess, is the nature of vinyl.

Sometimes it works perfectly, and sometimes you cut the wrong bit and it doesn't fit at all. Sometimes, of course, it's not your fault at all.

And that's the story I'm sticking to.